I am nothing if not extra. And my wedding is the ultimate reason for me to dress more extra than I ever had in my life. In deciding what to do with my hair, I had a lot of ideas, and even made another hair accessory before this one but decided it didn’t have enough height. Here’s how I made my crystal crown!
You will need
Gold plated beading wire-0.3mm
A tiara base headband
Beads and crystals of your choice
Ribbon
Wire snippers
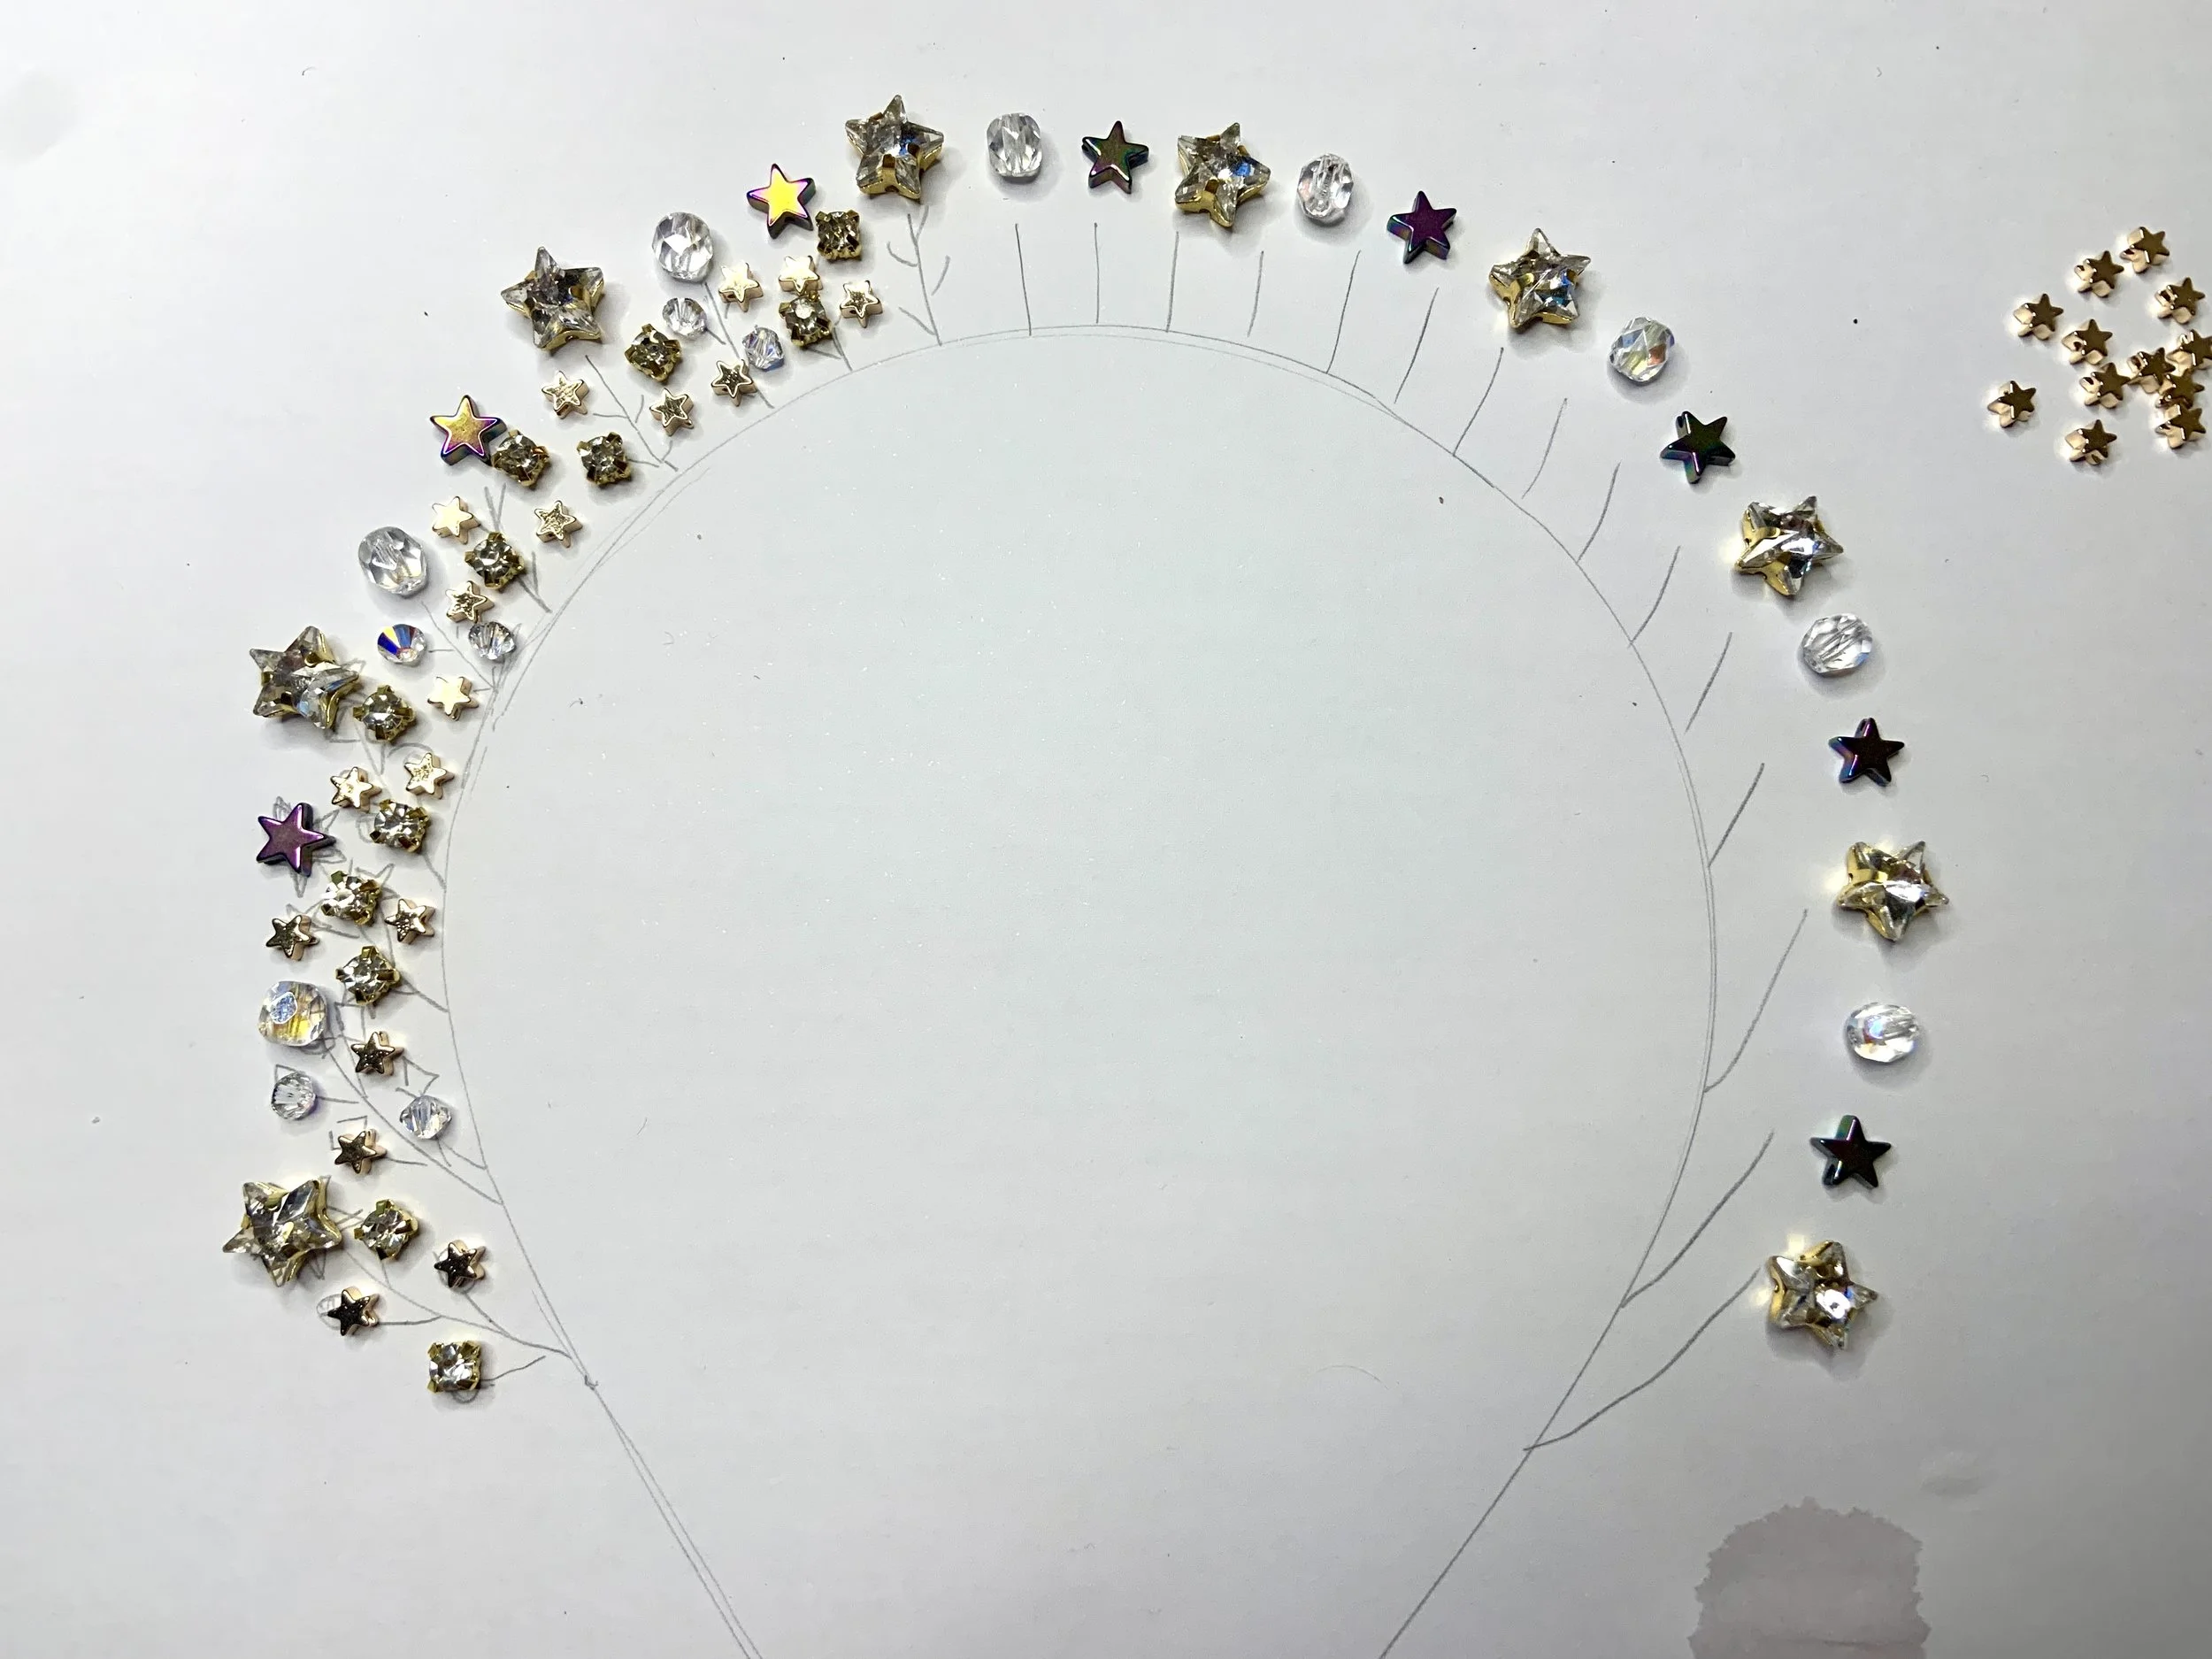
Map out how you want the crown to look first. Mine has little ‘branches’ of wire with five crystals and beads on each branch.
Now this is the fiddly bit!
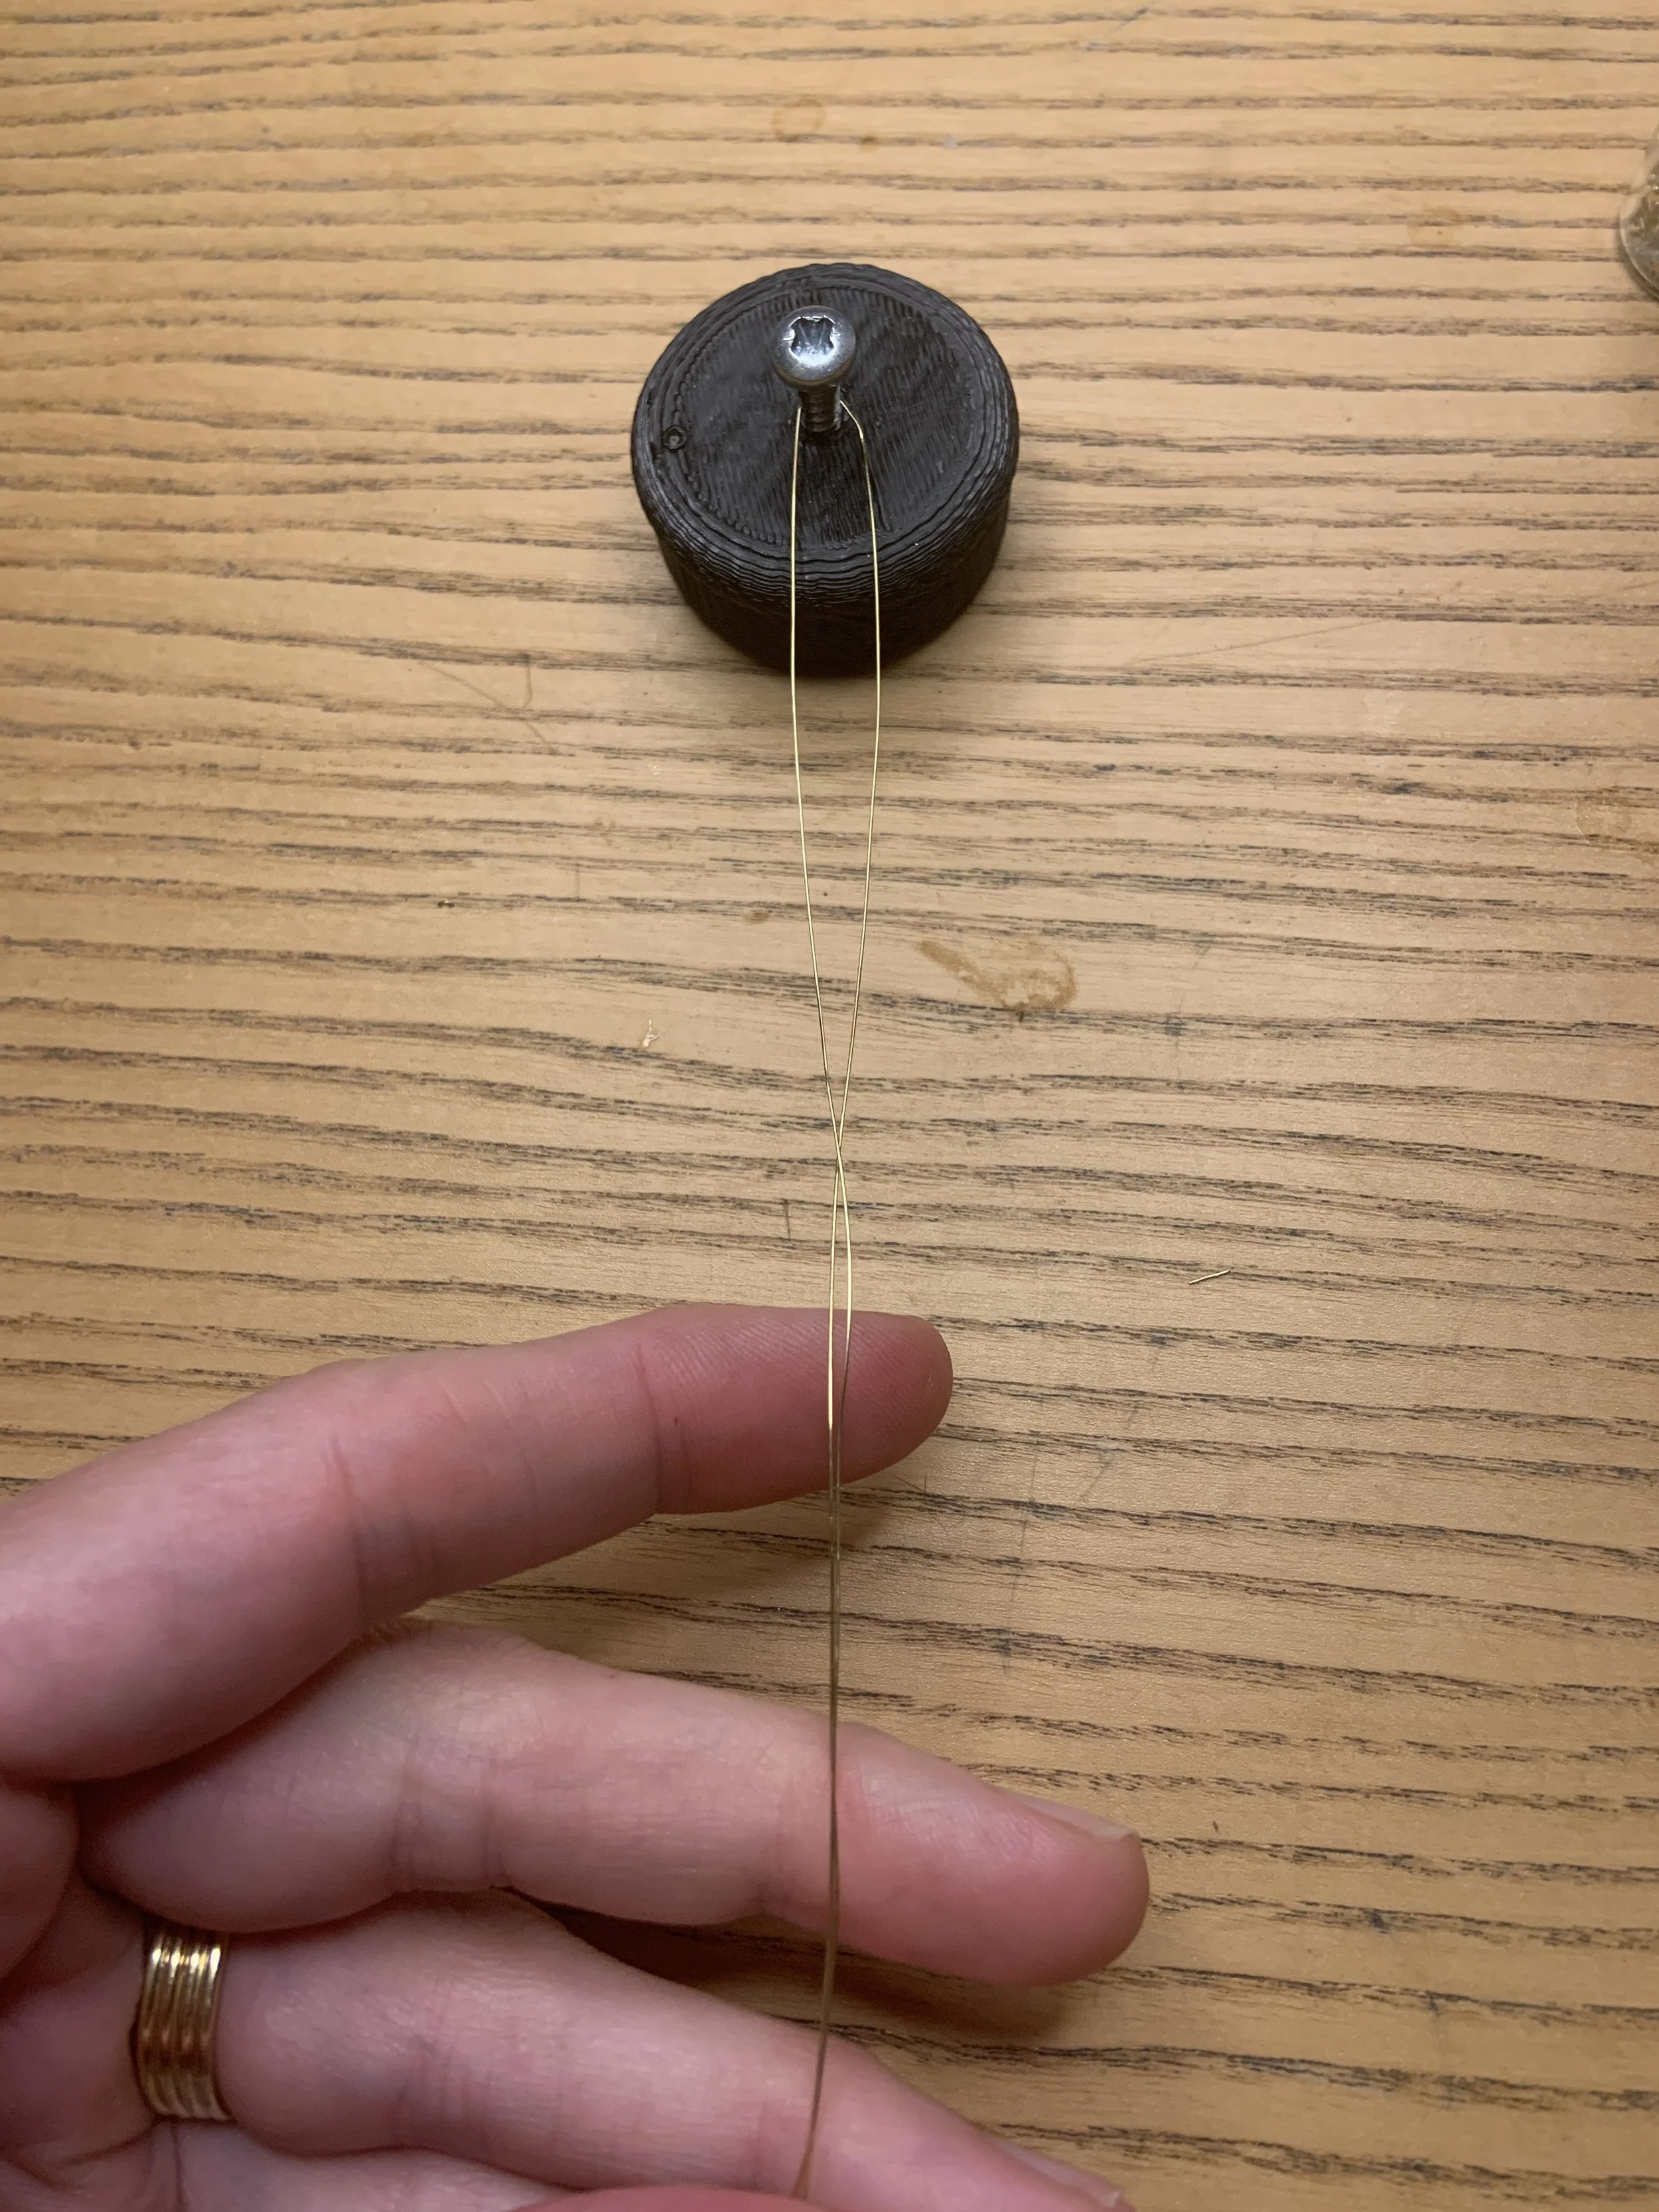
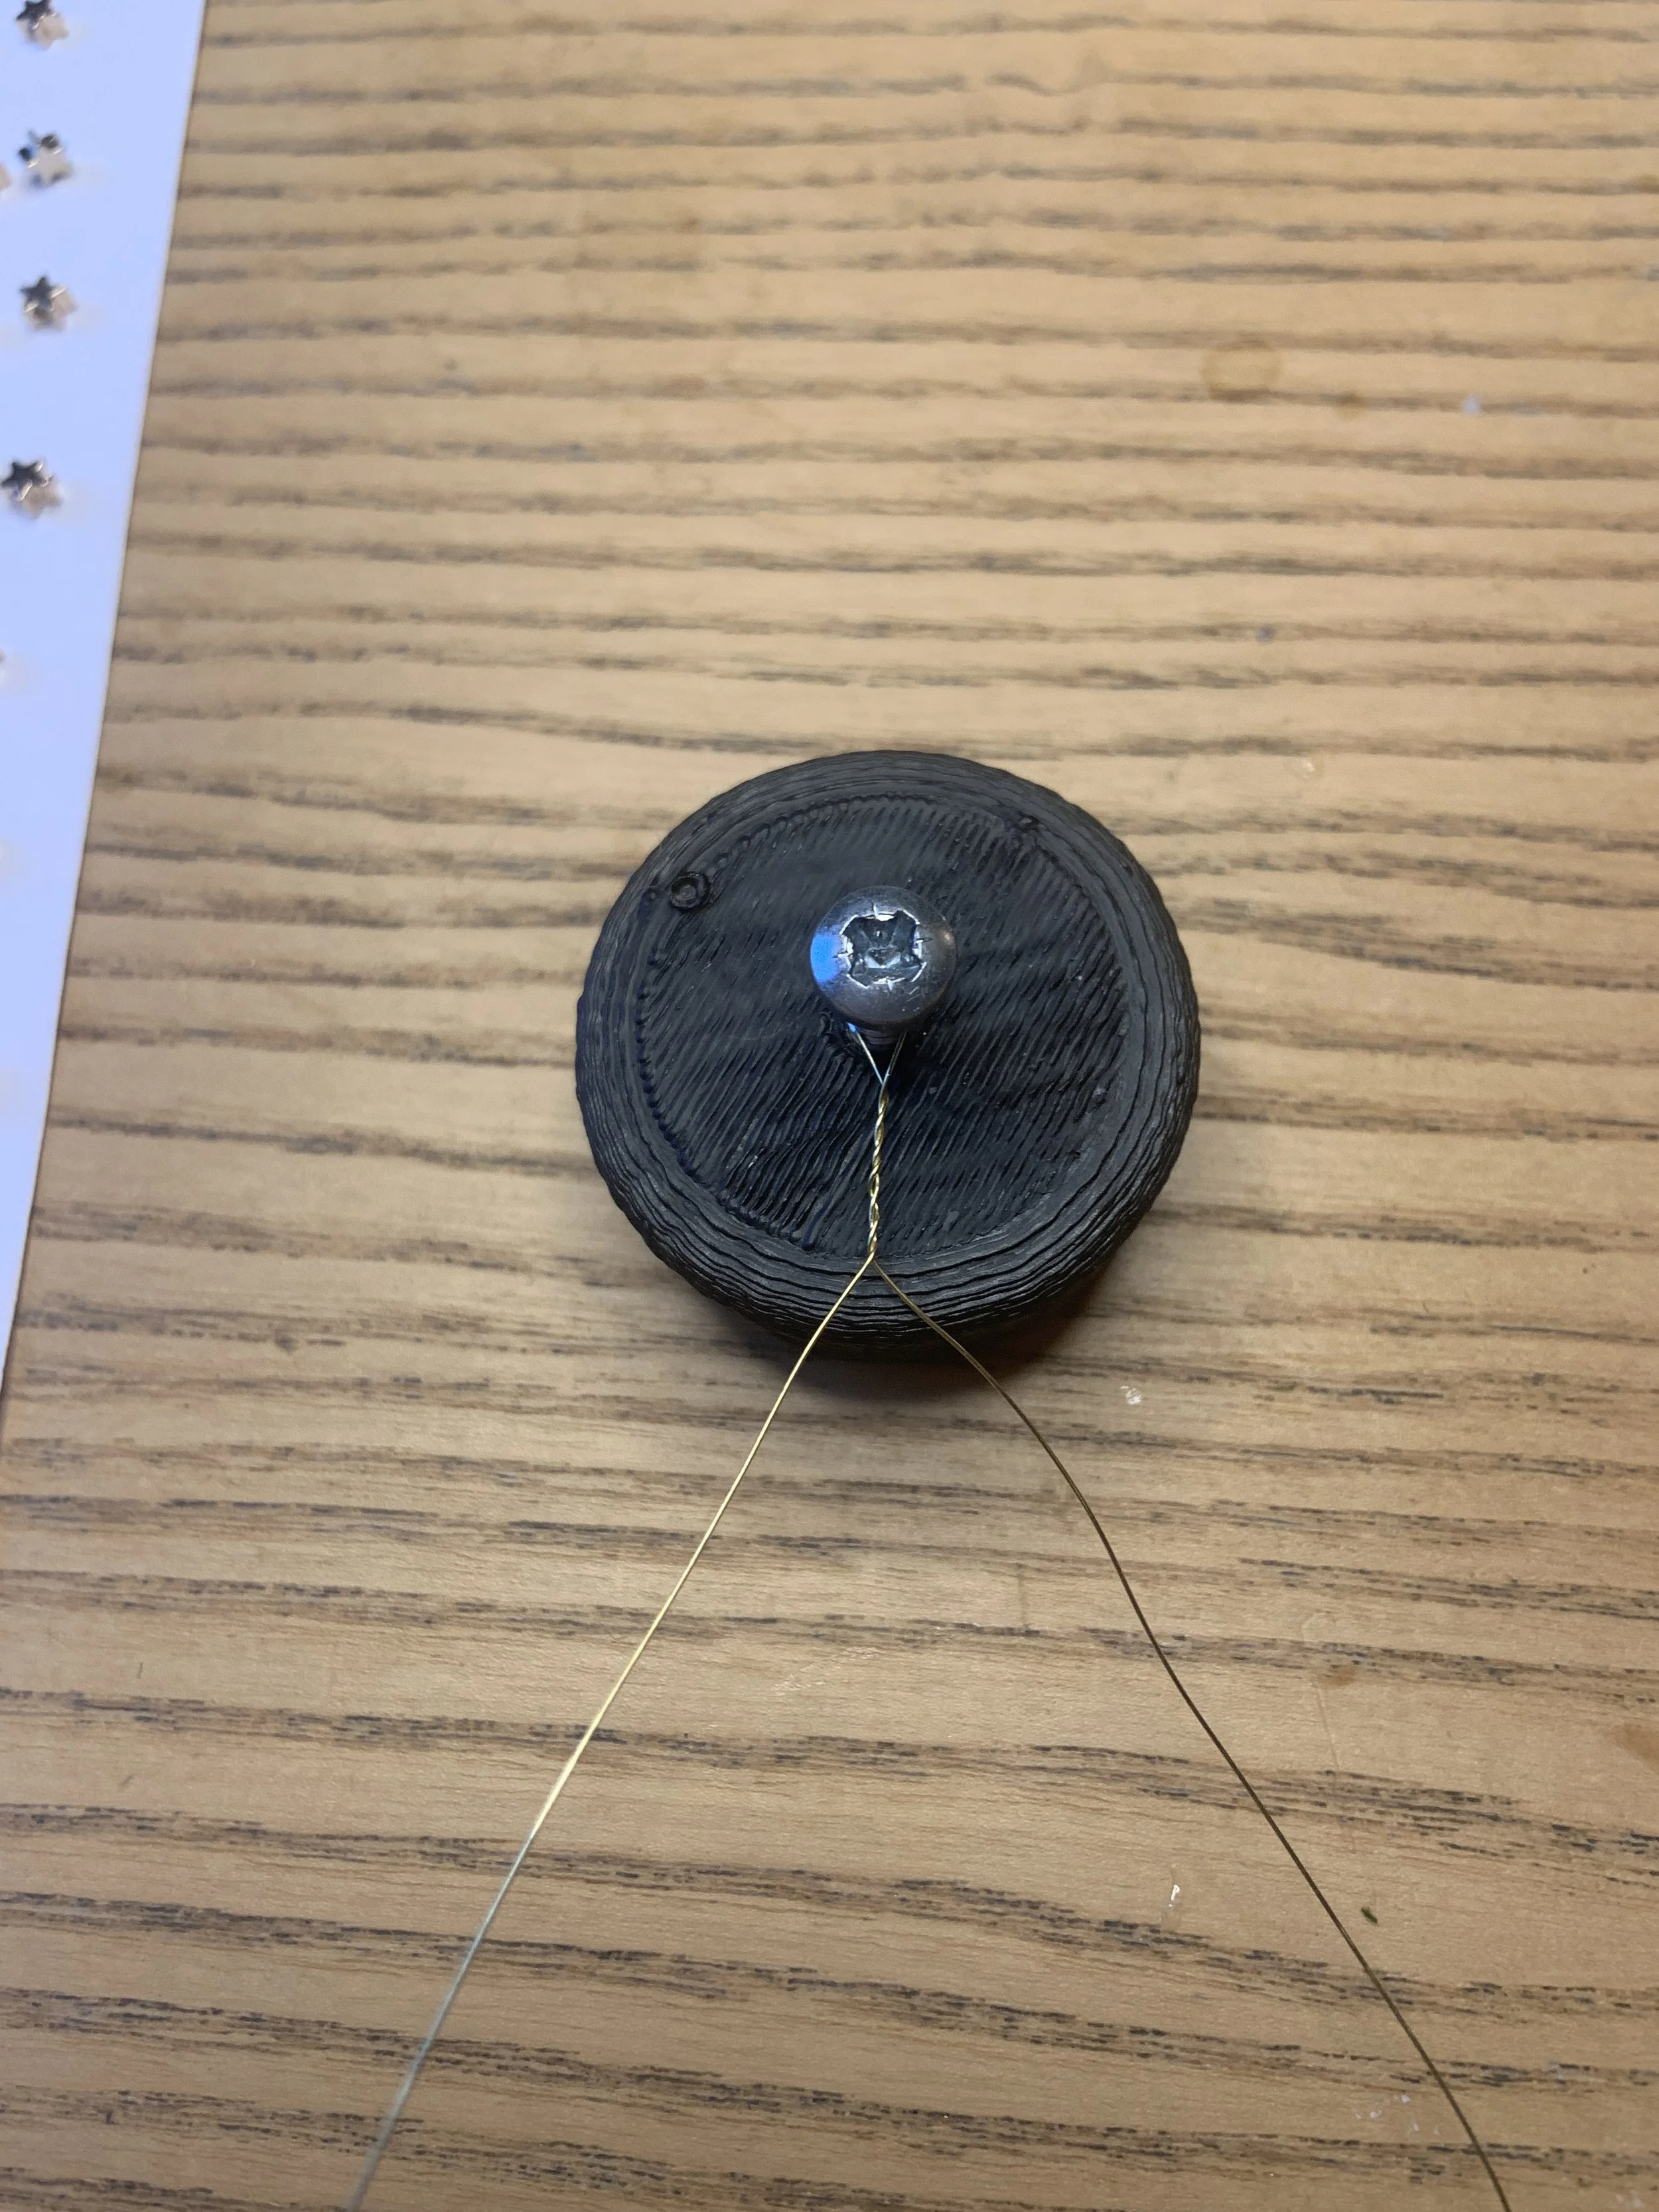
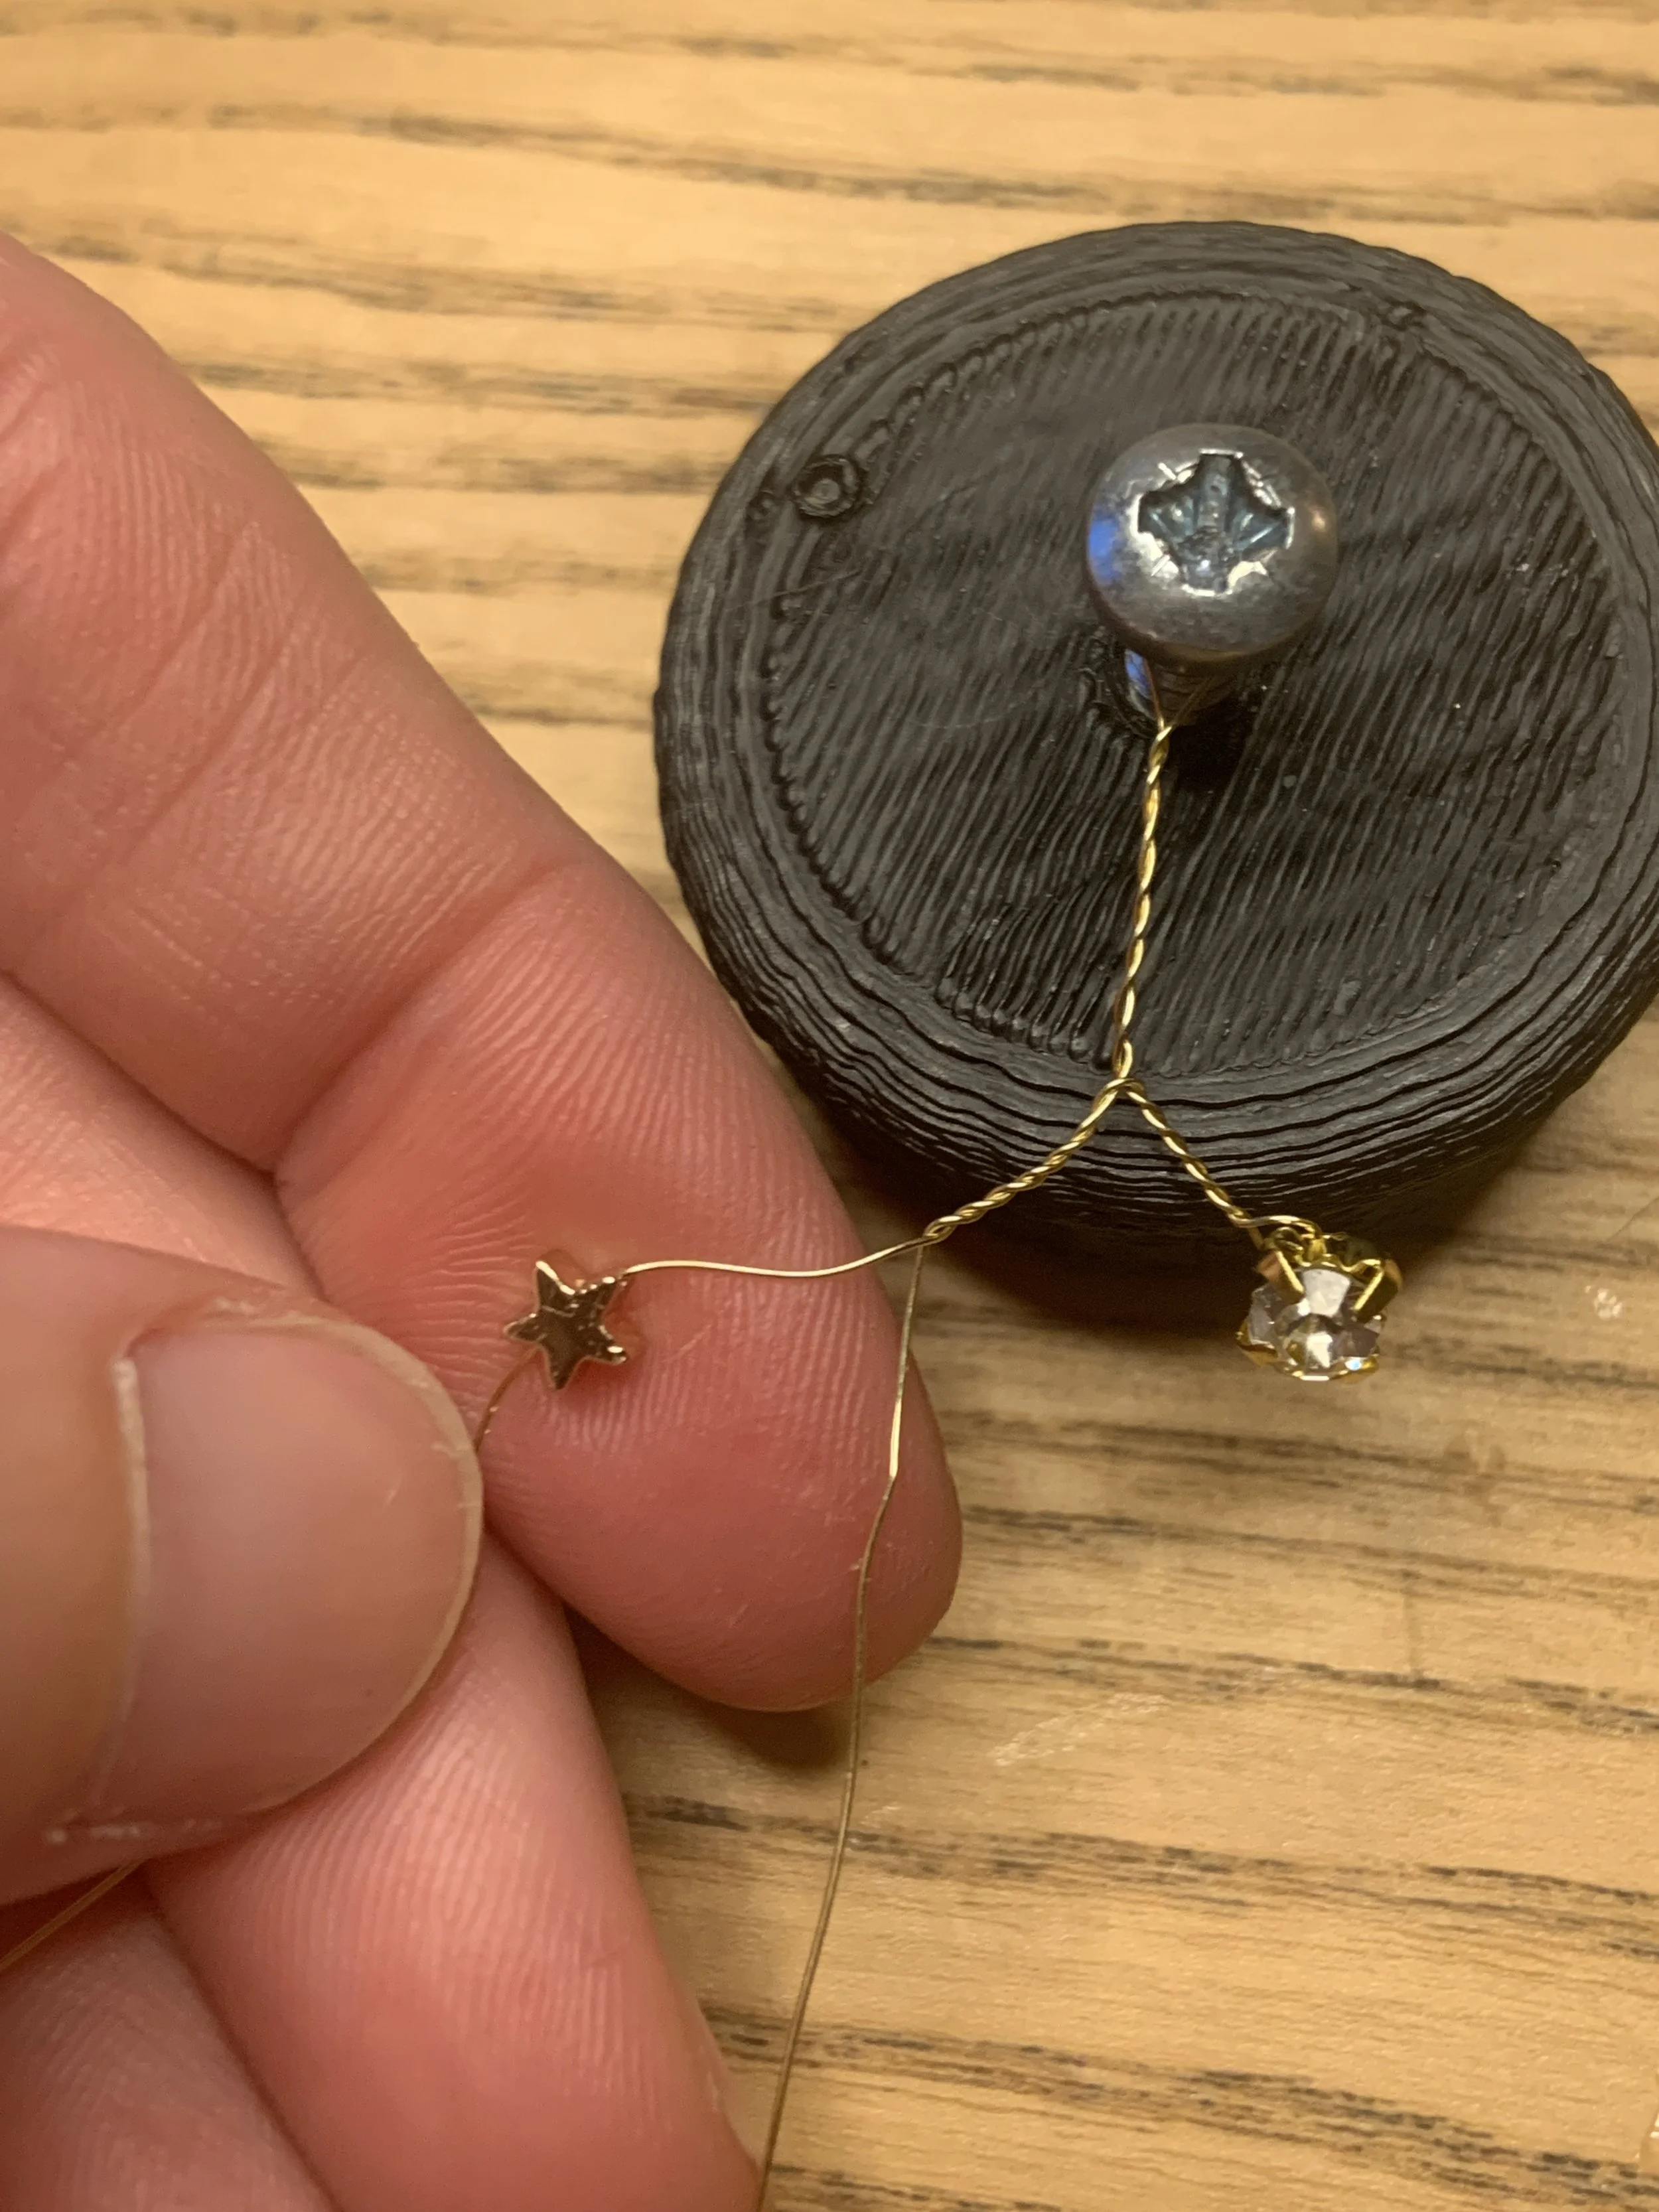
Find yourself an ‘anchor’ Mine is a piece of 3D printed plastic with a screw in it. Stick it down to a surface as you need some tension. Take a long piece of wire, around 20cm in length and loop it around the anchor in the middle. Twist the wire quite tightly for about 2cm as you will need this length later to attach it to the hairband.
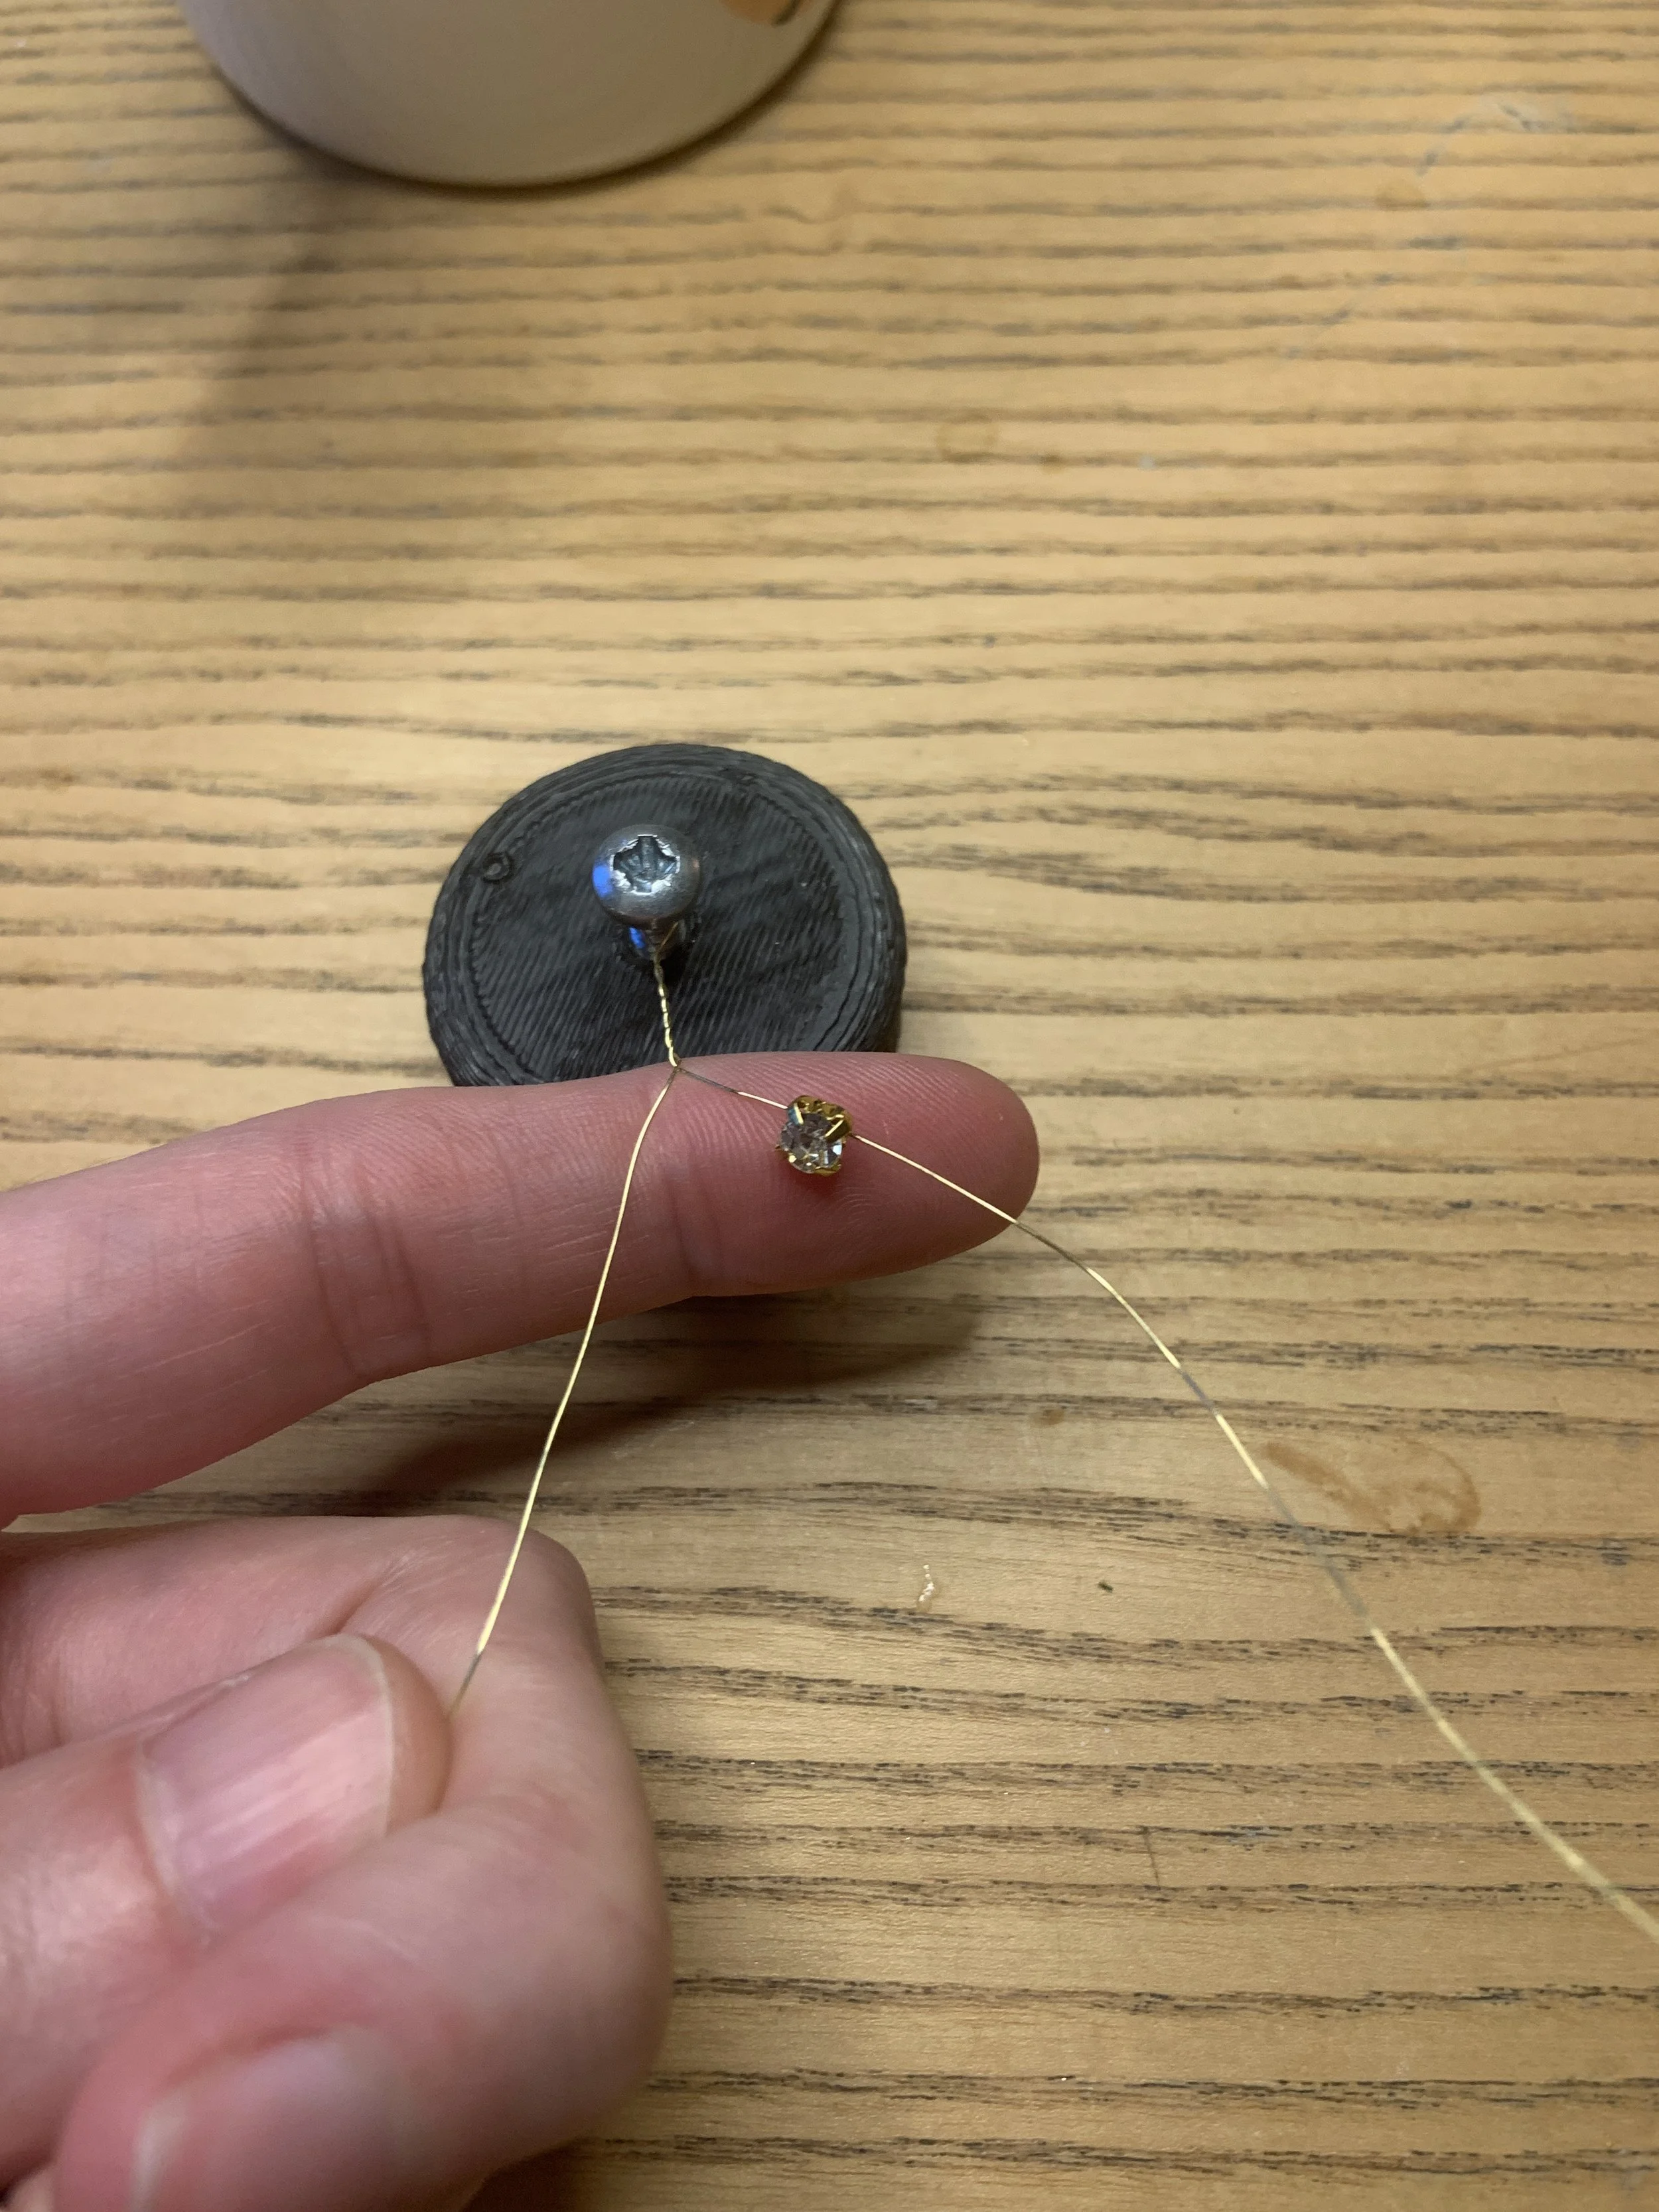
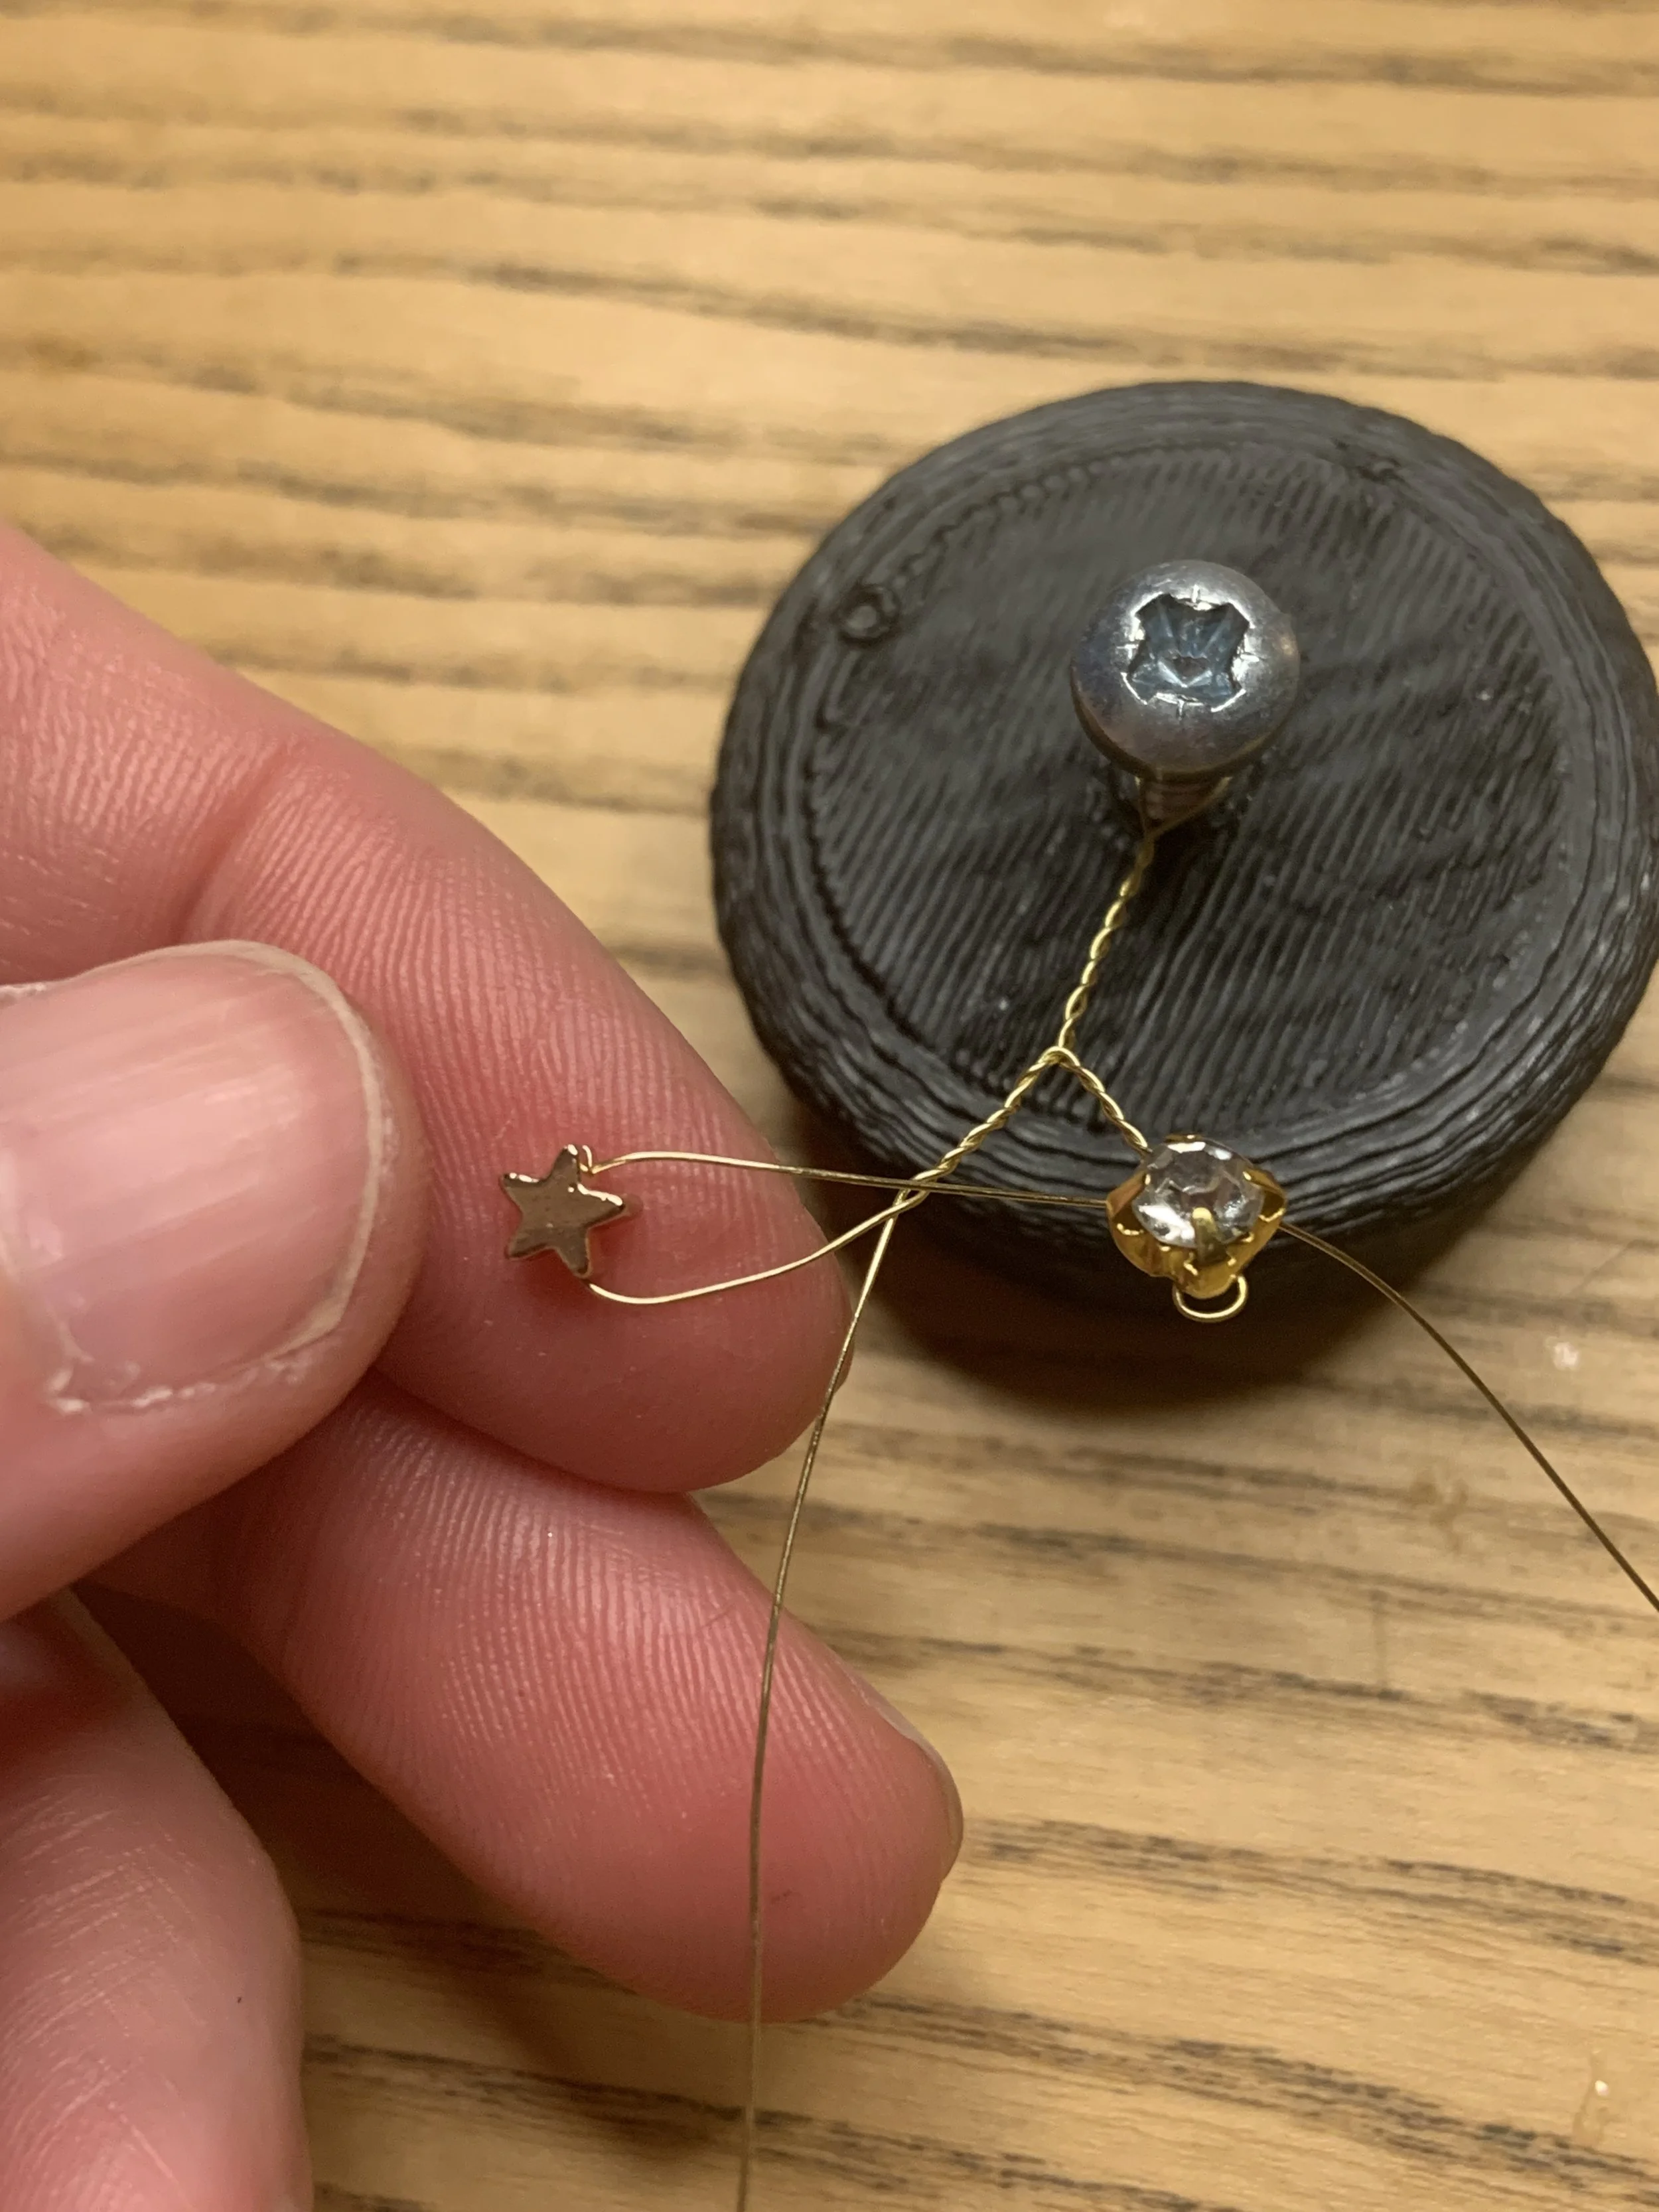
Start one of the ‘branches’ by threading a bead onto it. These crystals have 4 holes in the setting, so to ensure that it doesn’t spin around, I threaded the wire through all 4 holes. Then bend the wire back on itself to create a loop with the bead at the top.
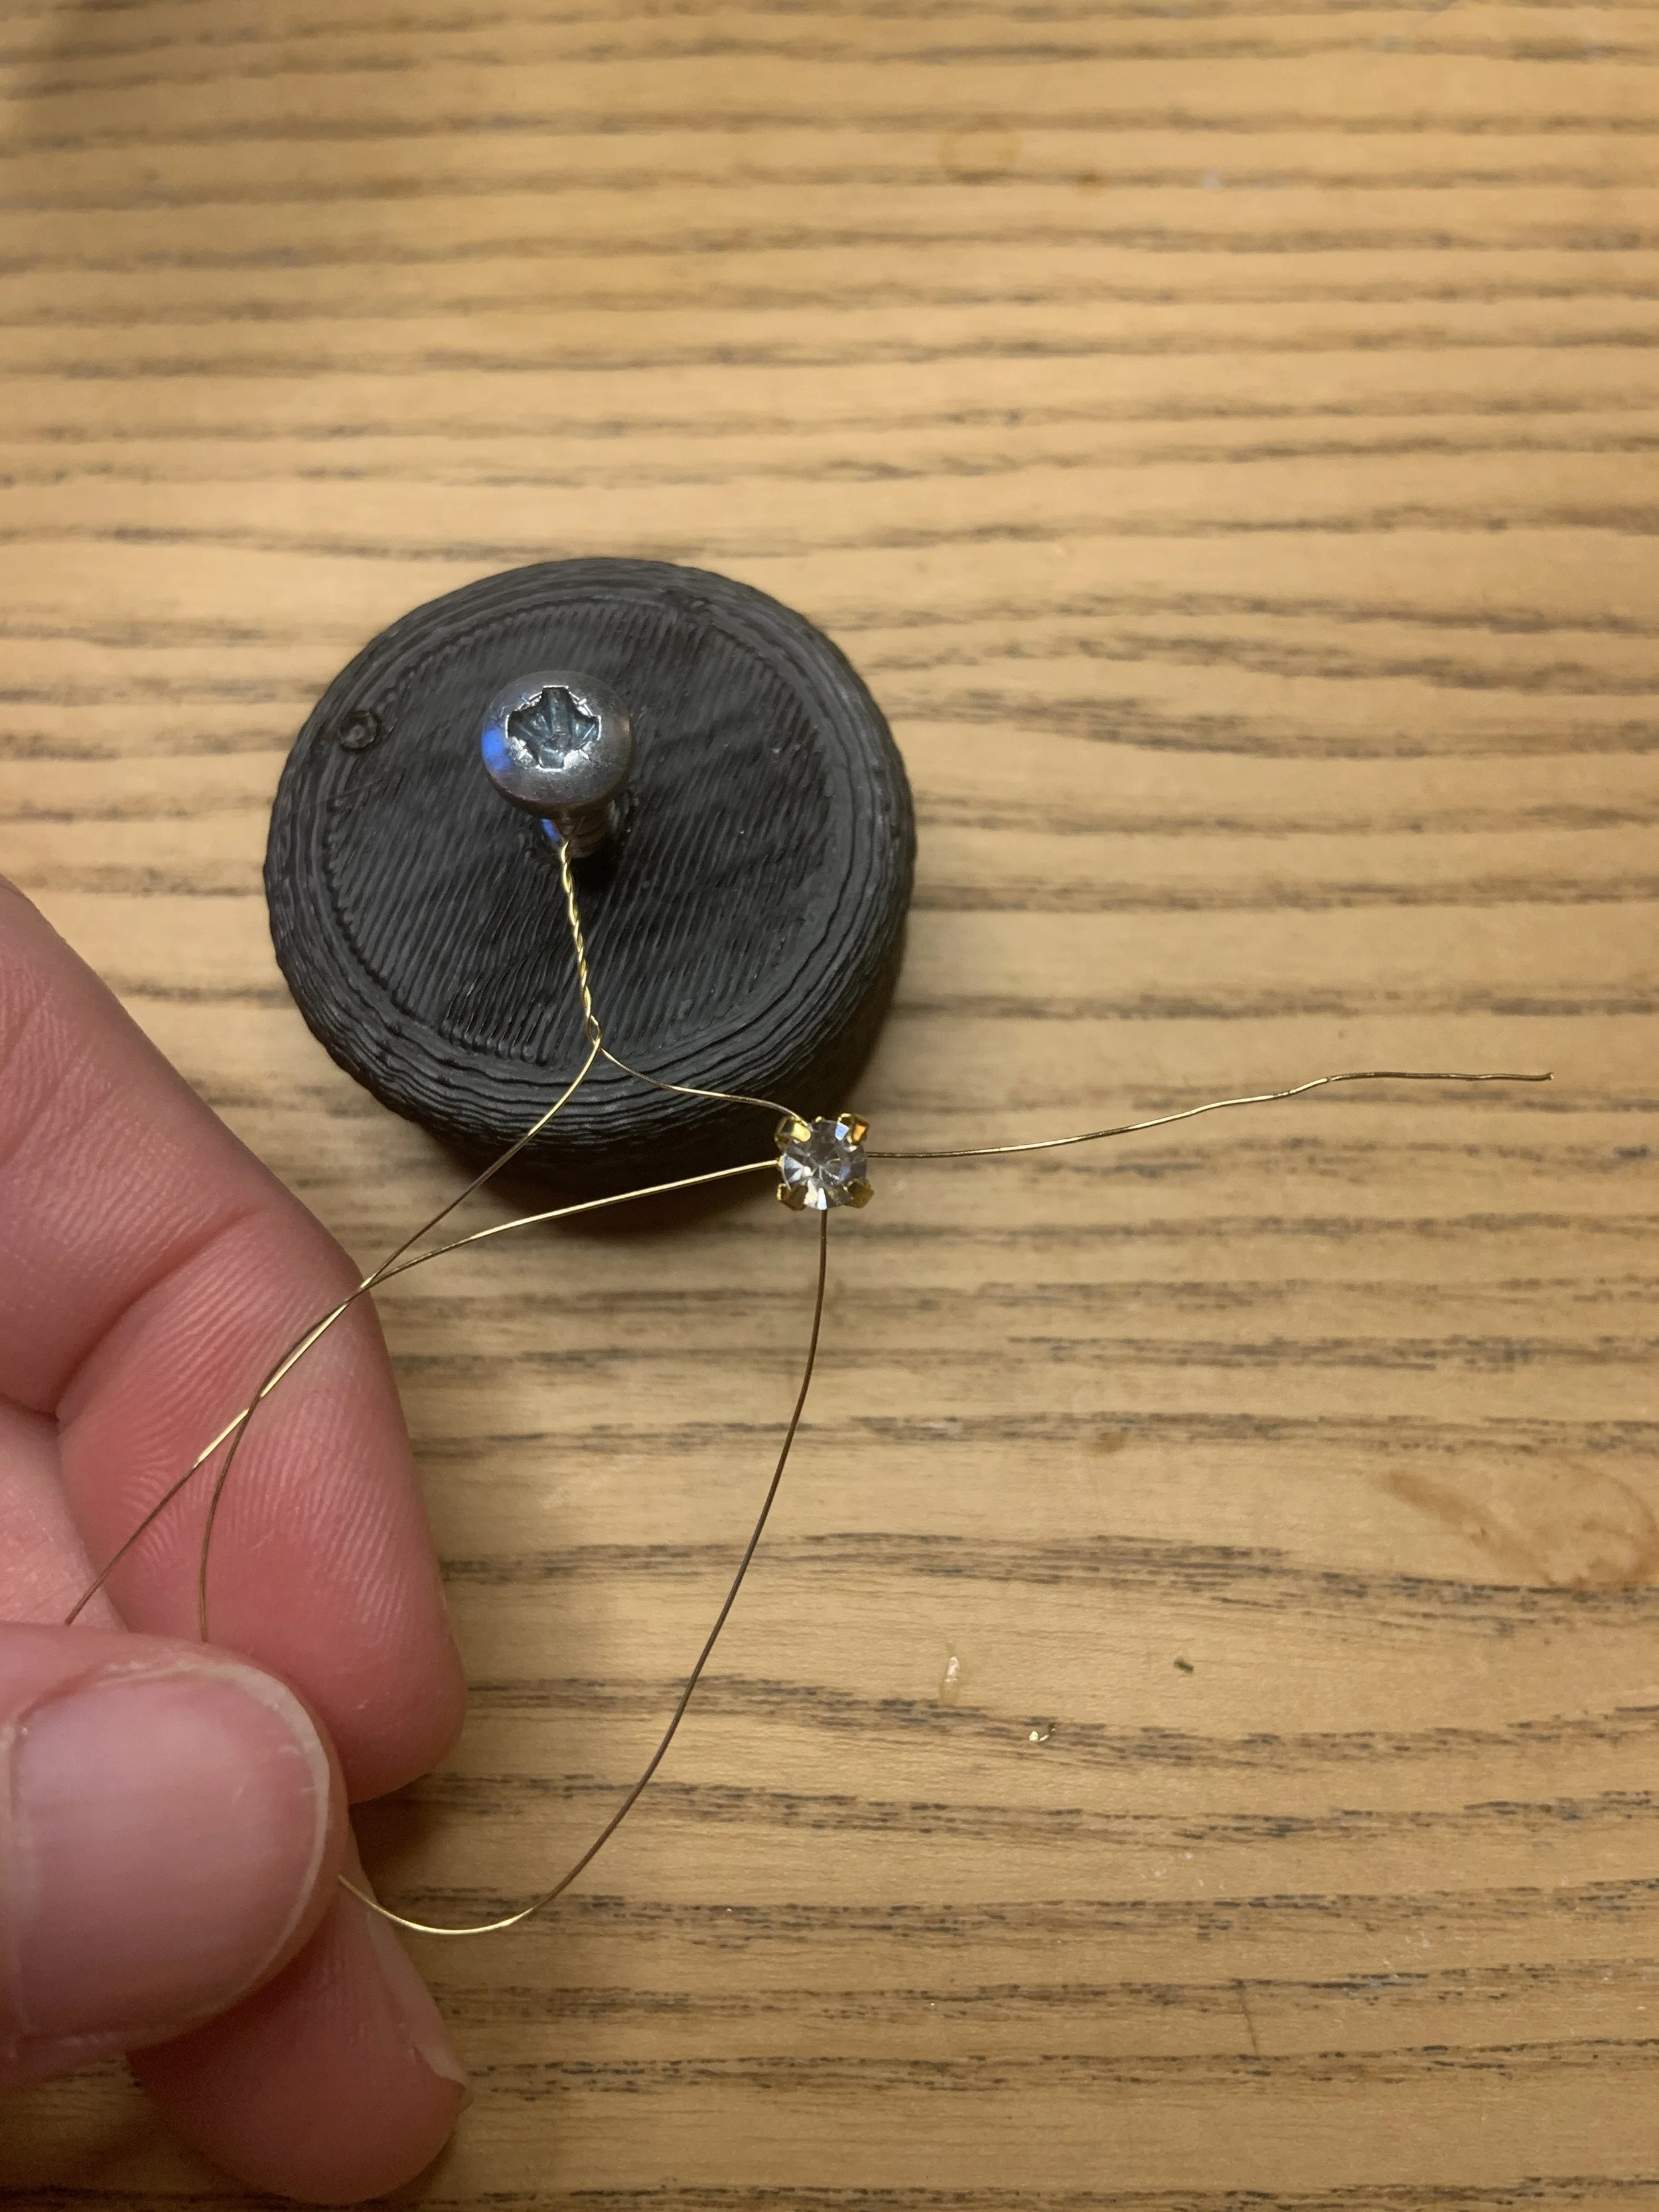
Twist the branch so the wire moves back down to the bottom of the junction.
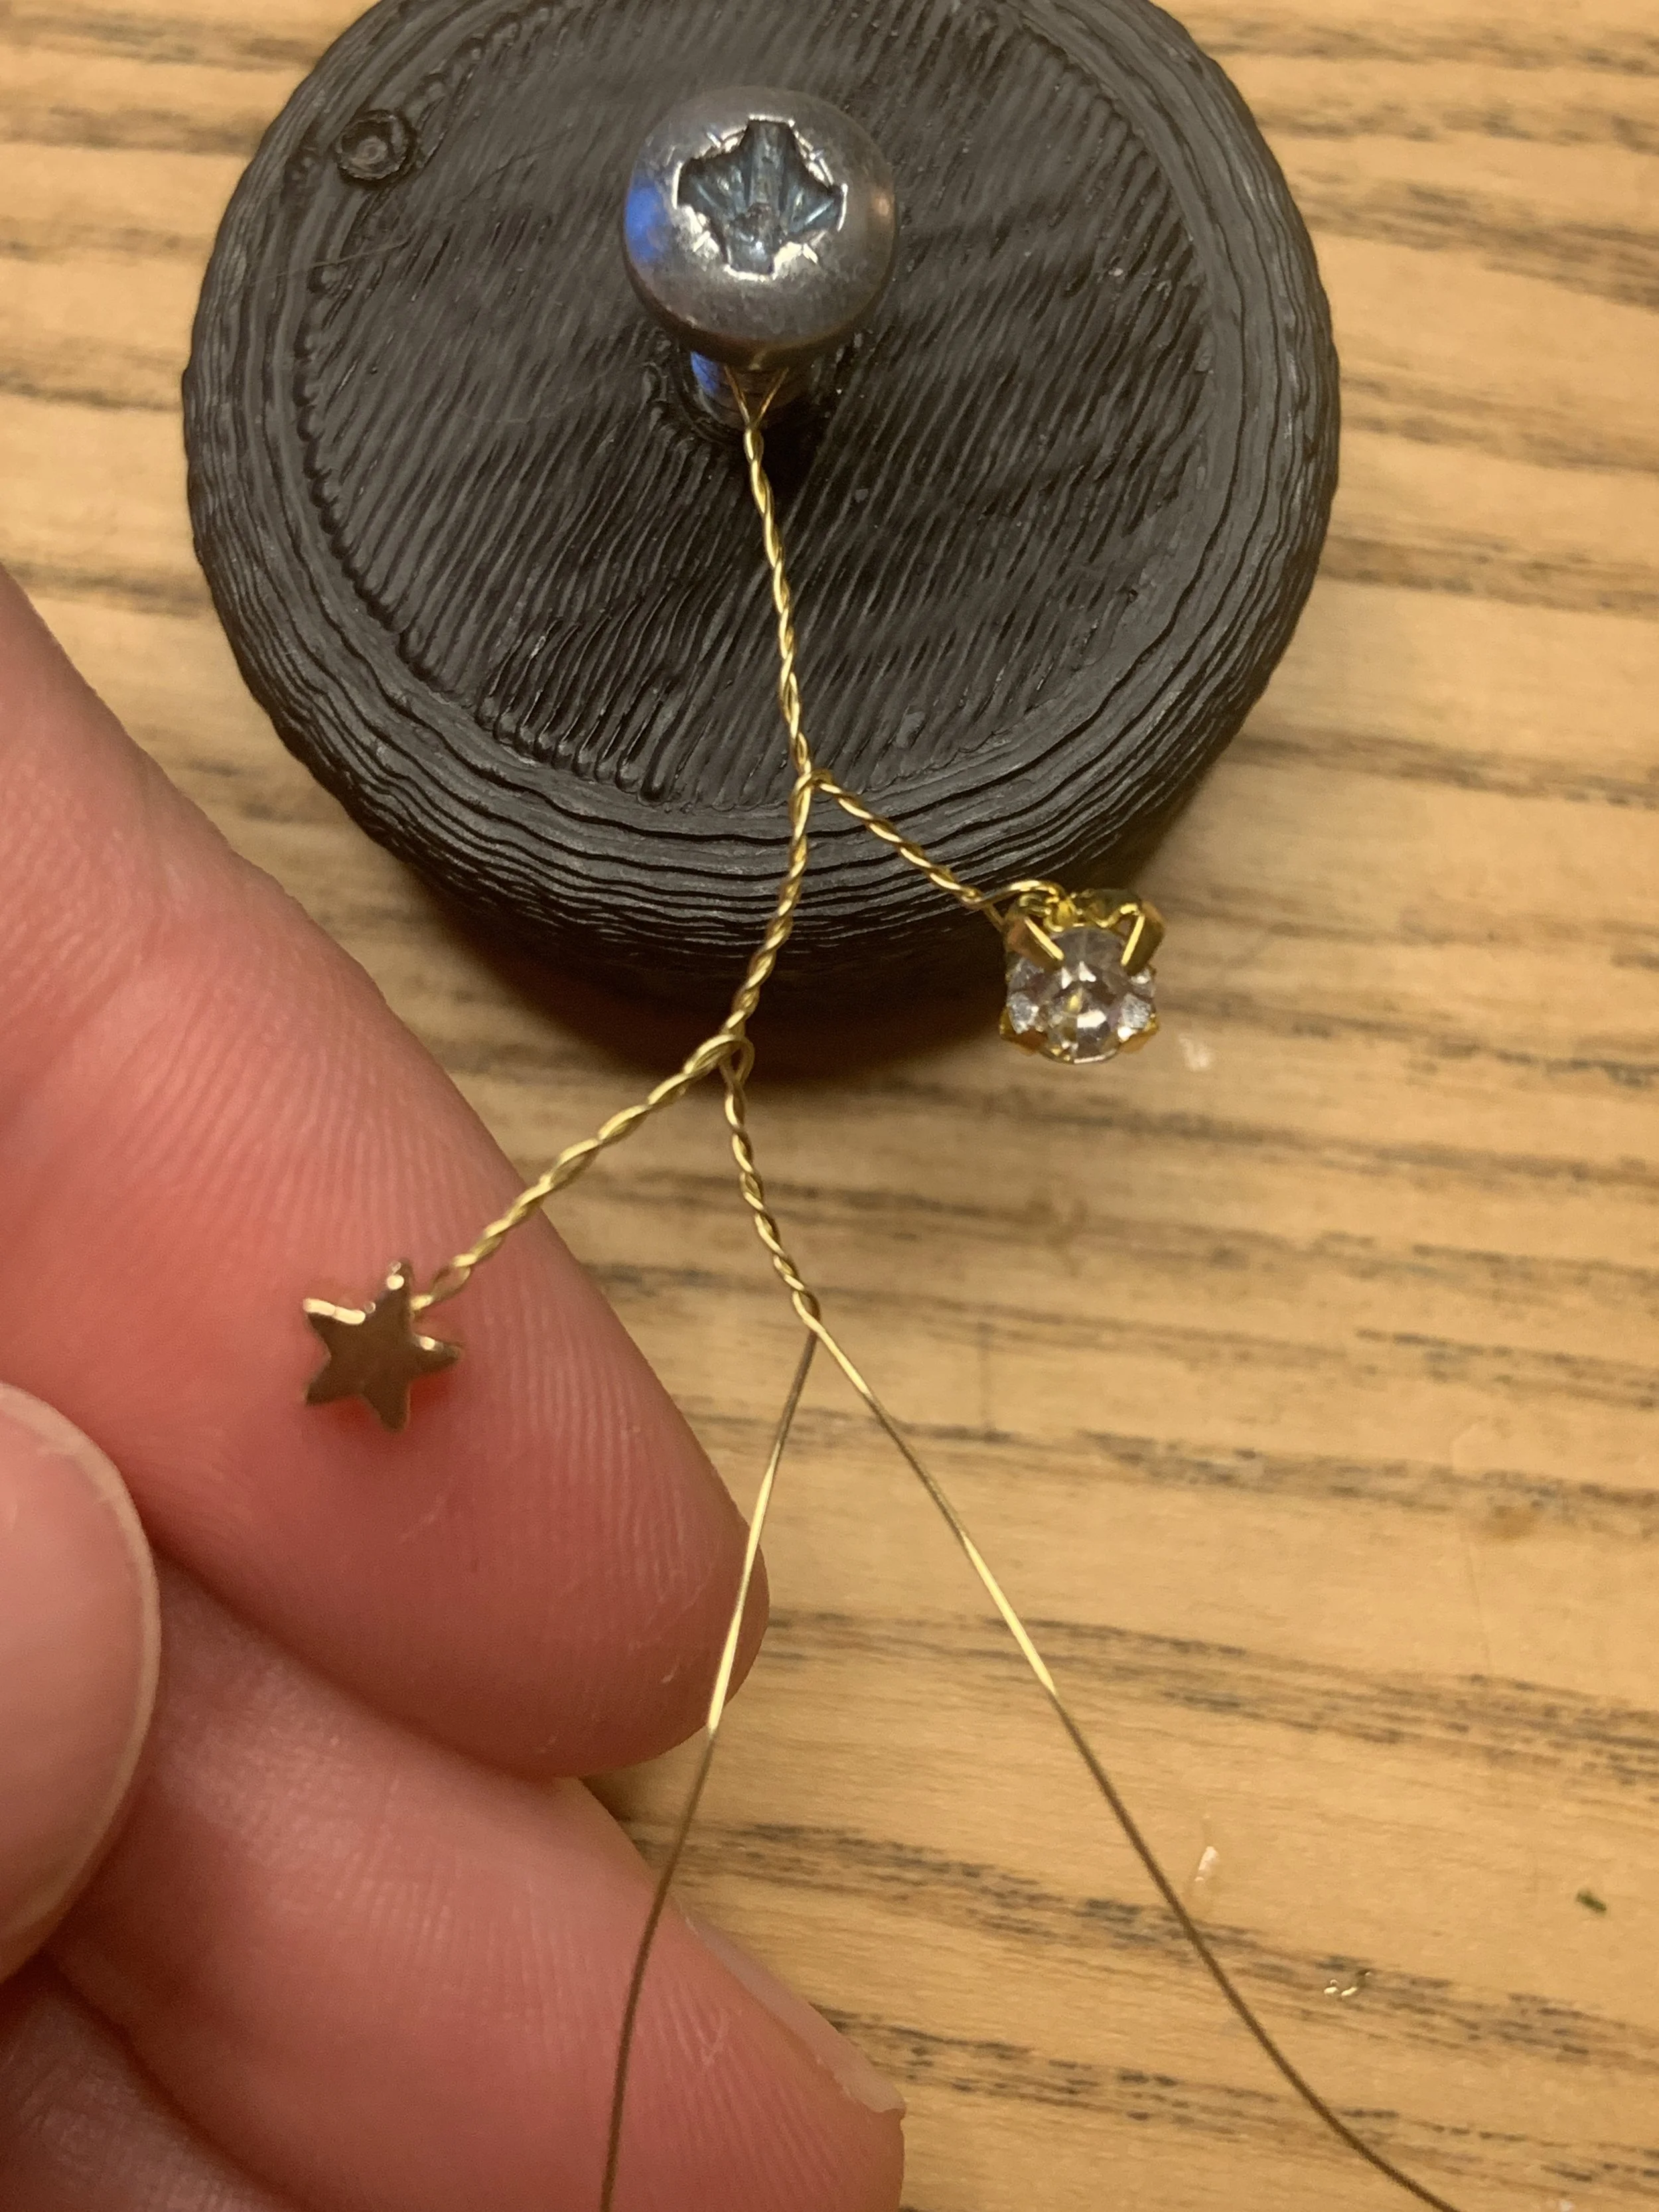
Twist the wire another centimetre or so, then add a different bead.
These beads only have two holes, so I twisted the wire tight under it to keep it in place. Then twist the wire back down to the base of the branch.
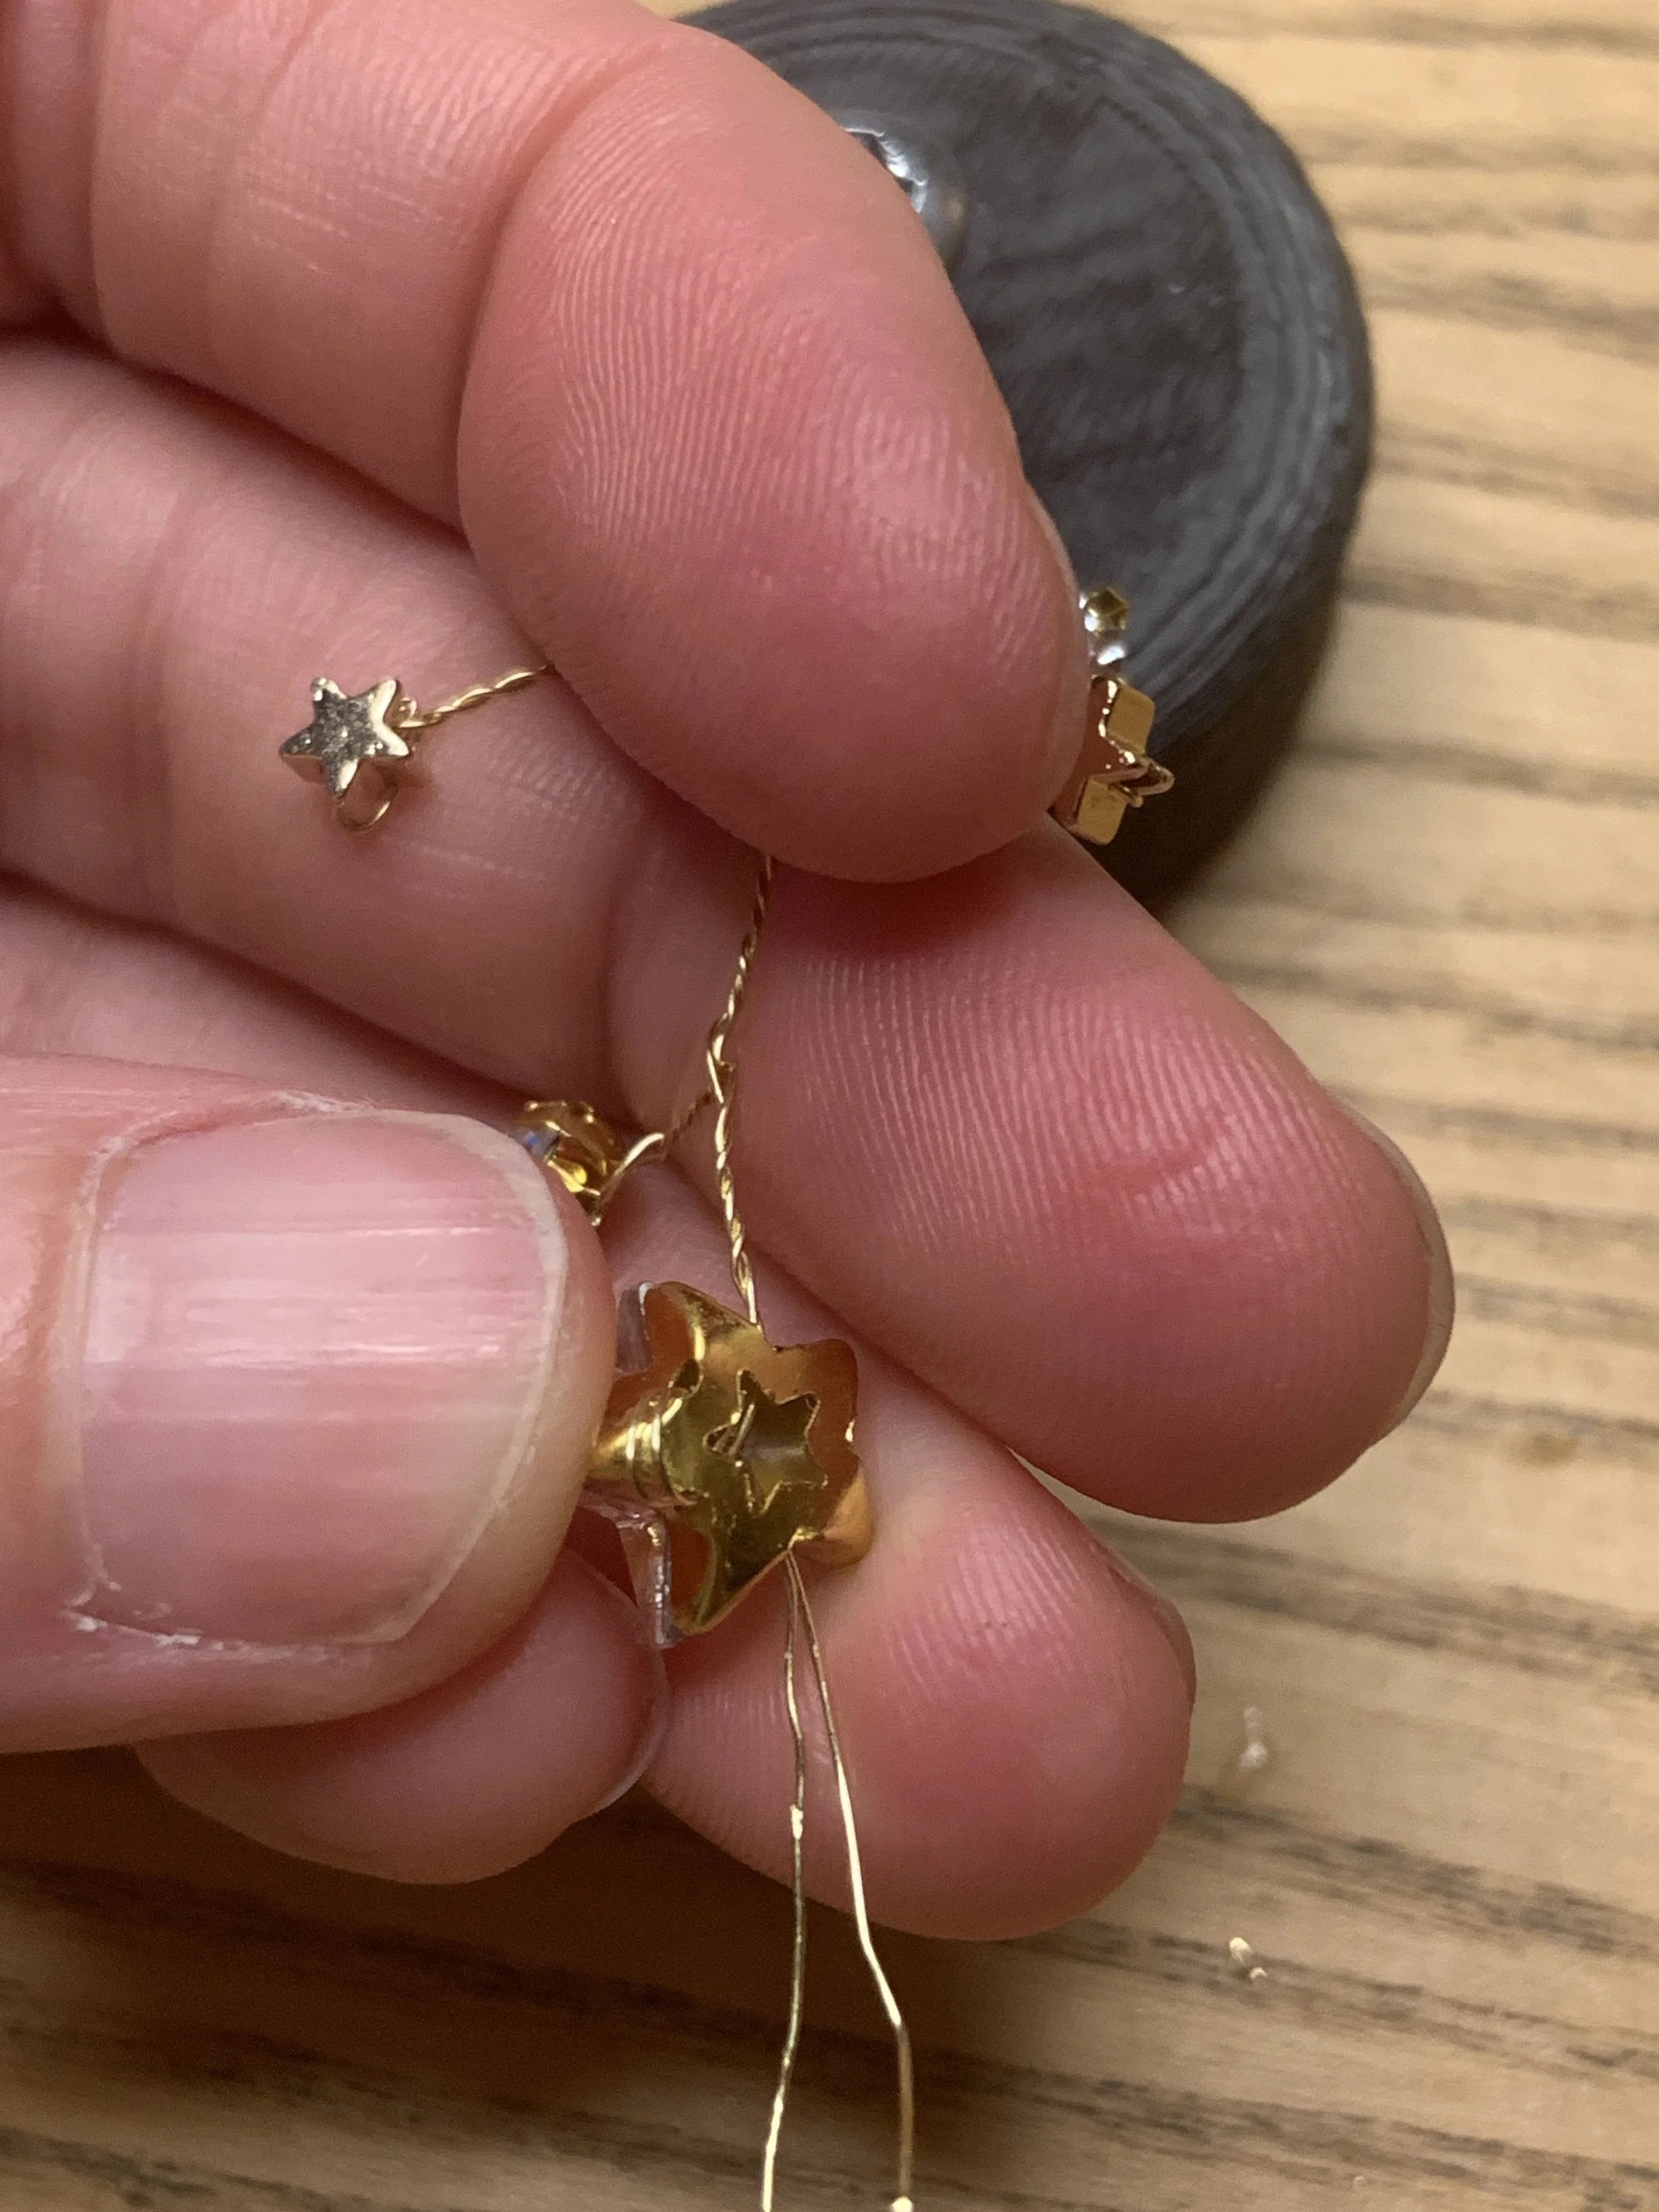
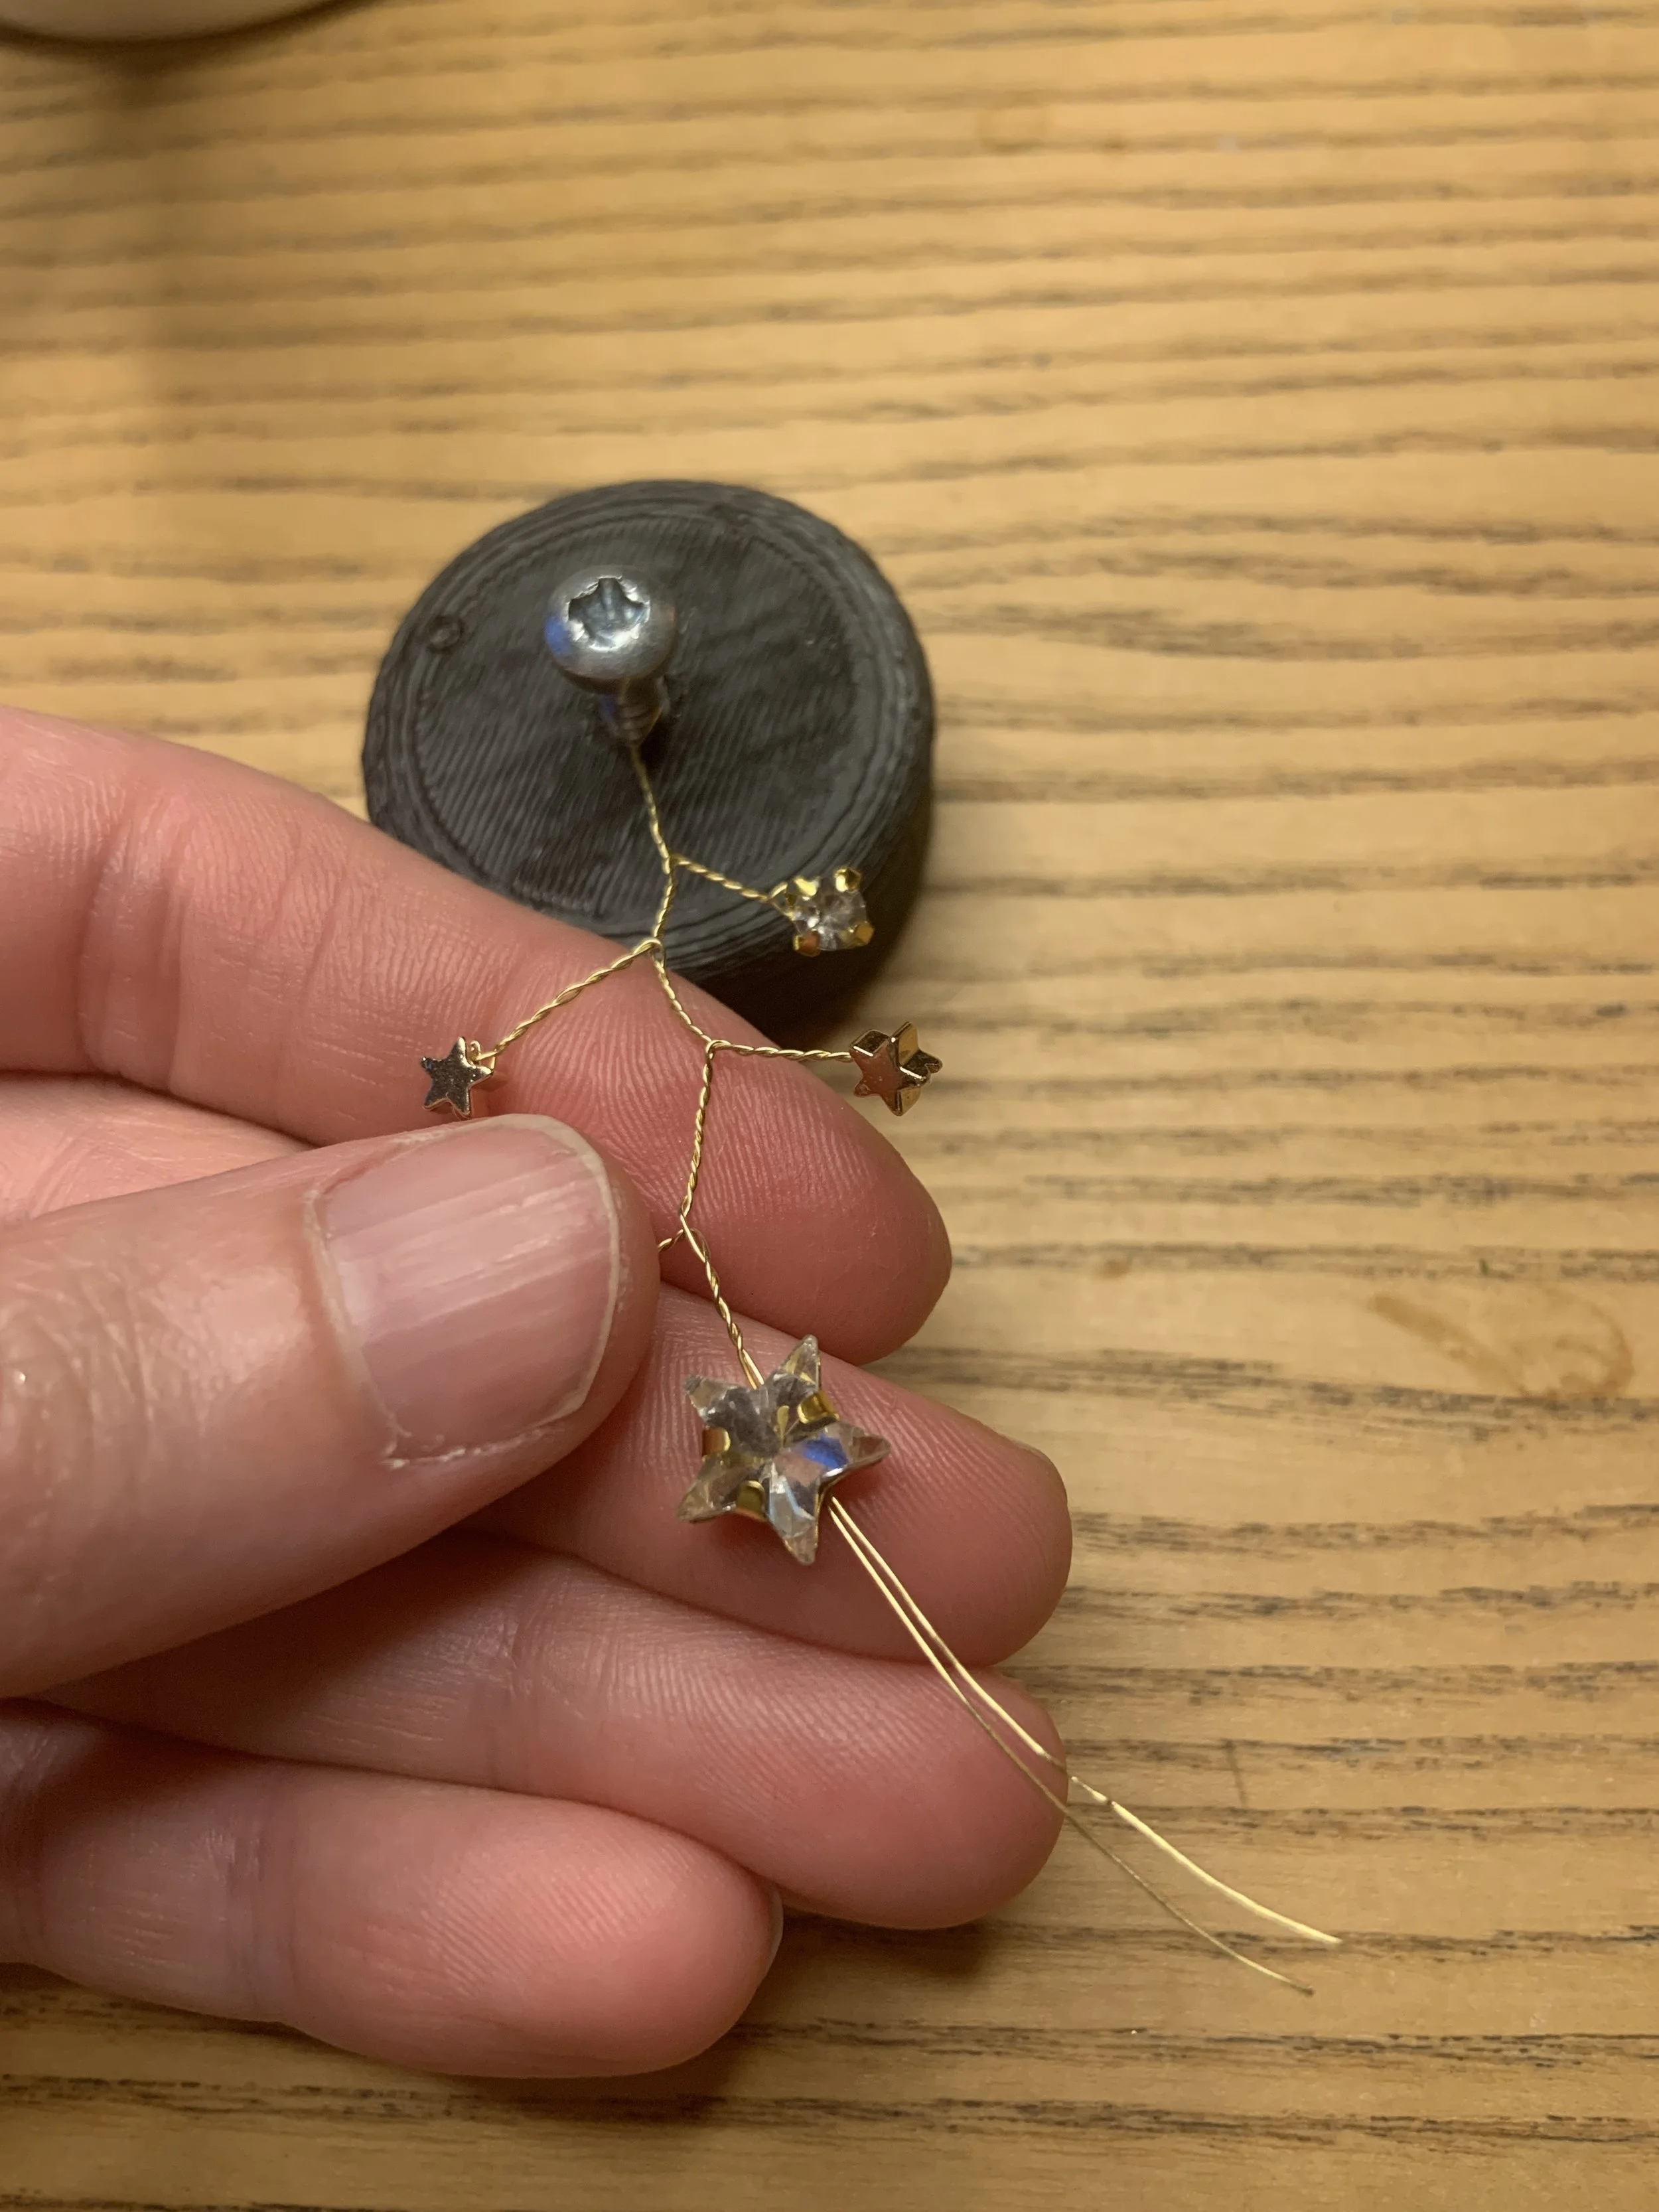
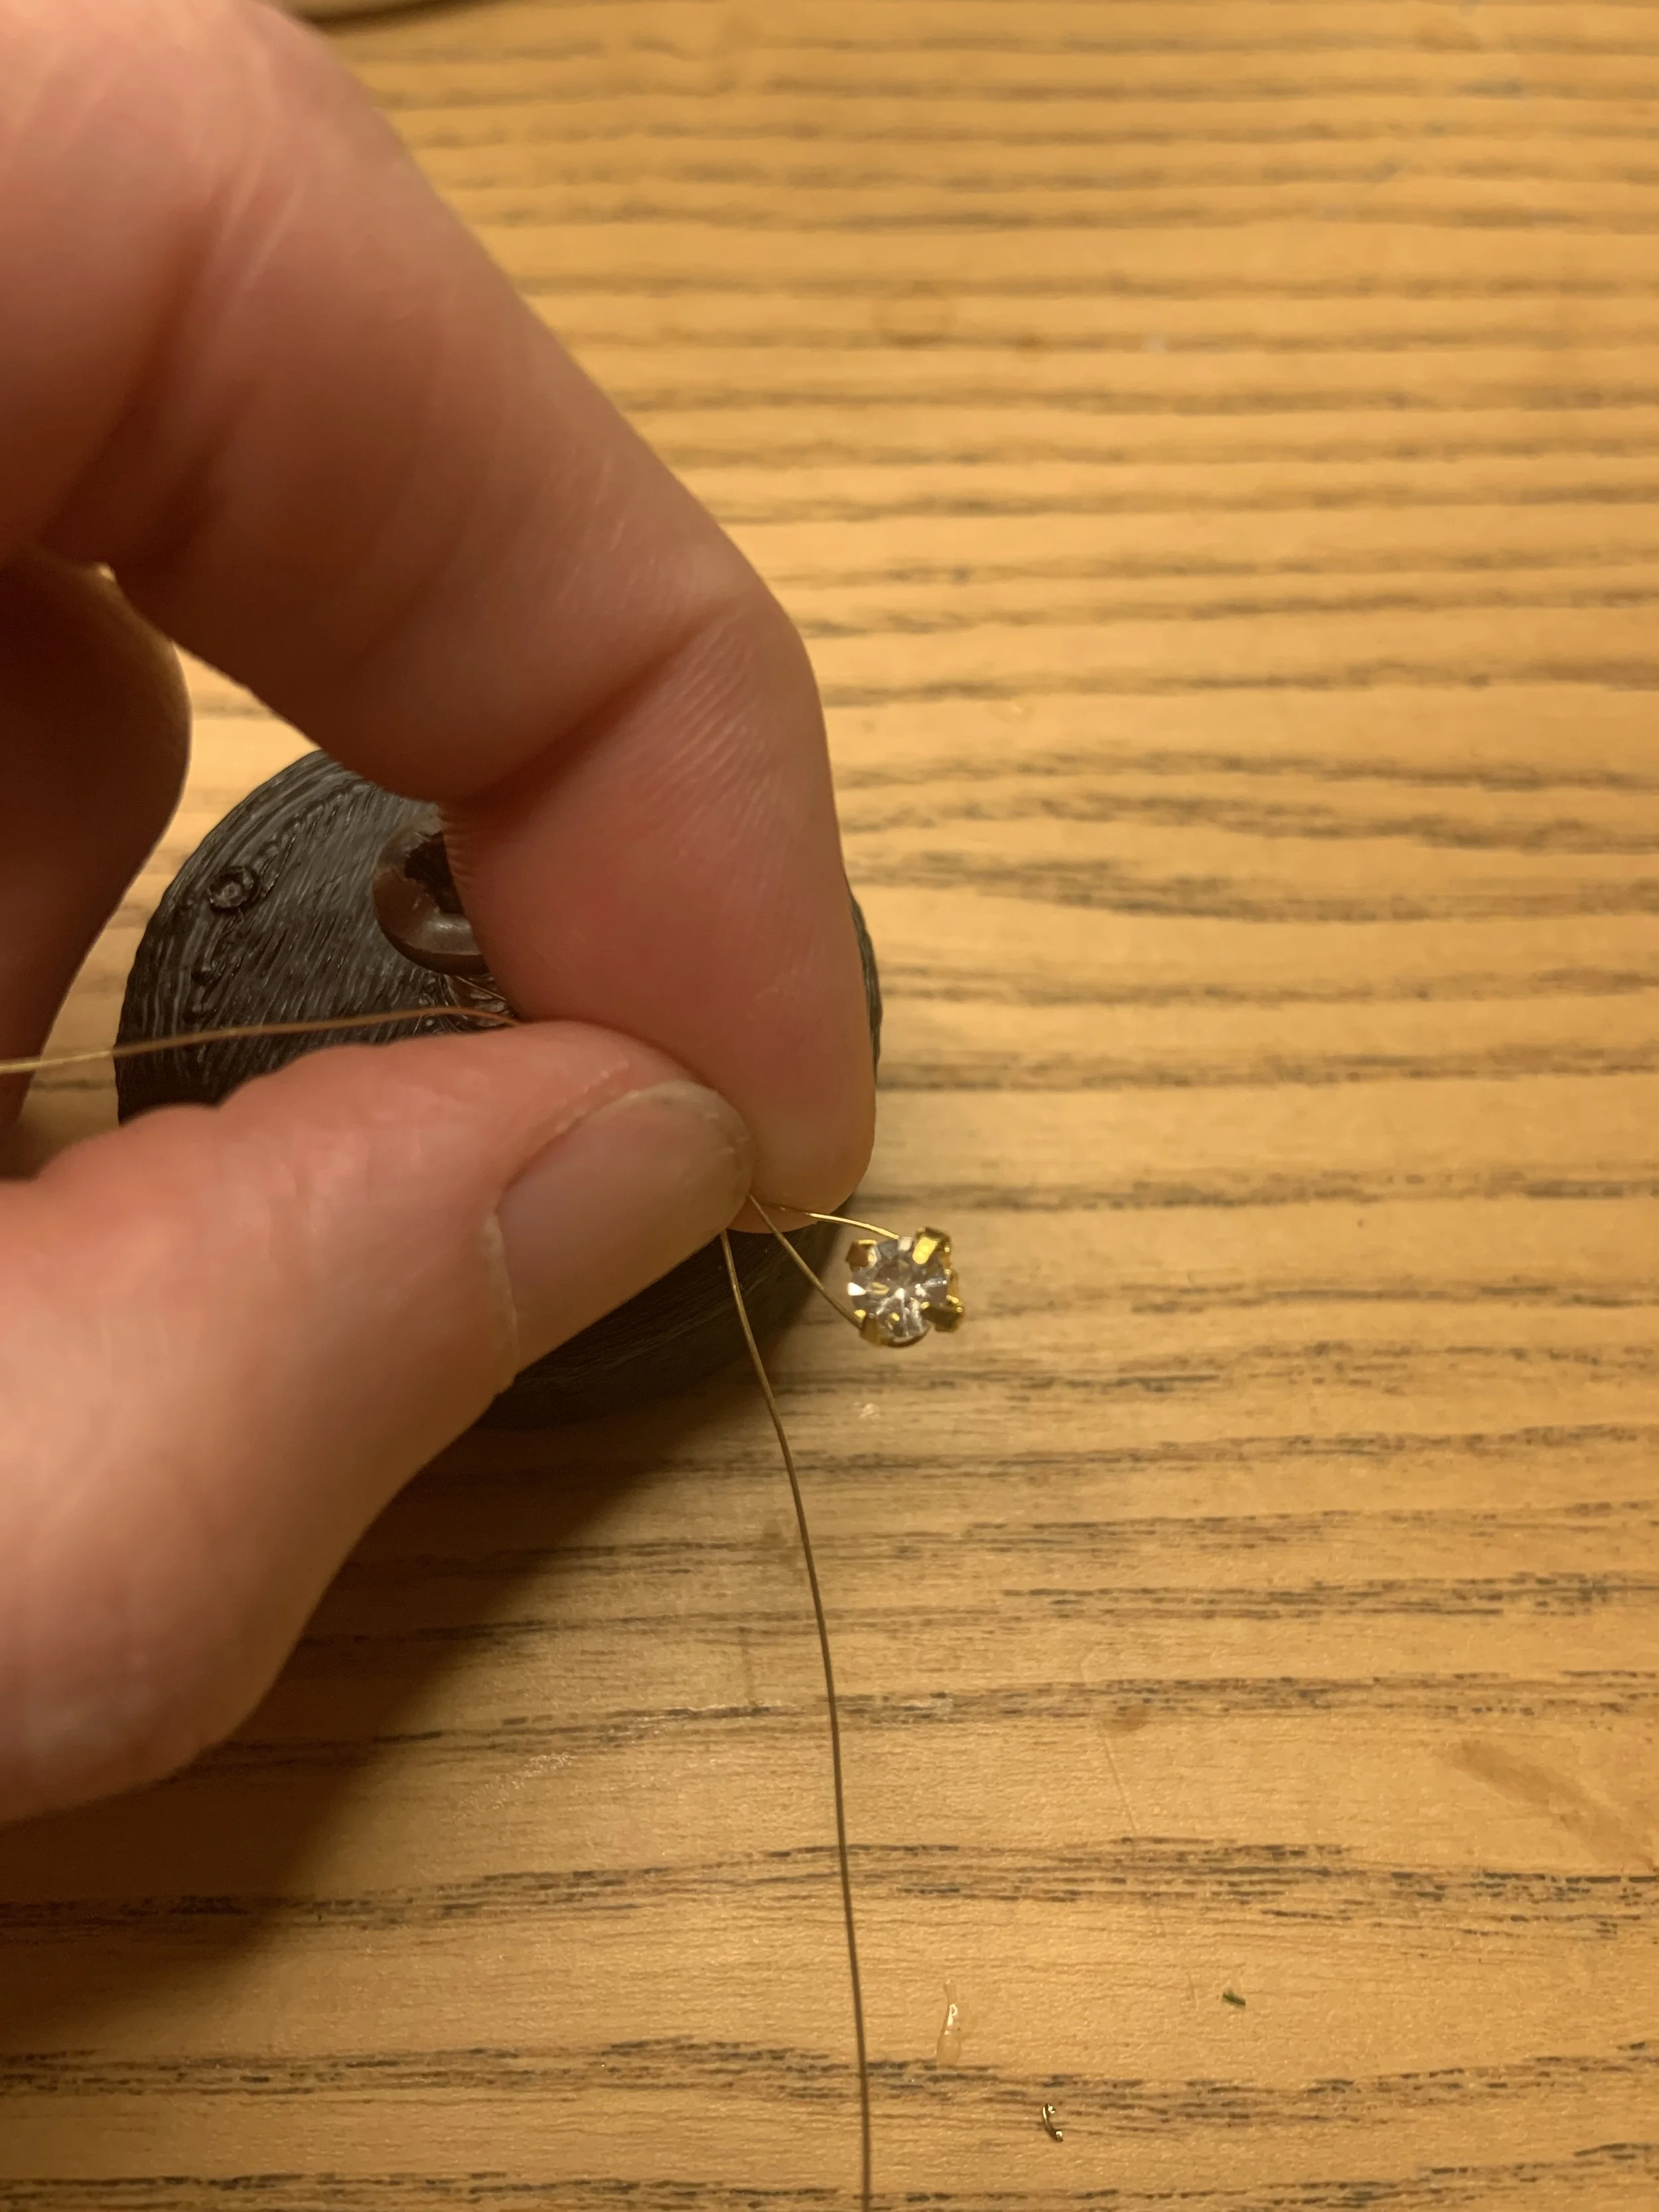
Repeat this process until you have as many branches as you want. To finish the branch, twist the wire up 1cm, then thread both parts of the wire through the bead you want at the end. These crystal stars have 5 holes, so I threaded through 2, then looped the wire around to go through another 2 to keep it in place. You can then twist the wire back down the branch to the junction between the top two branches and snip it off. You’ve made your first branch!
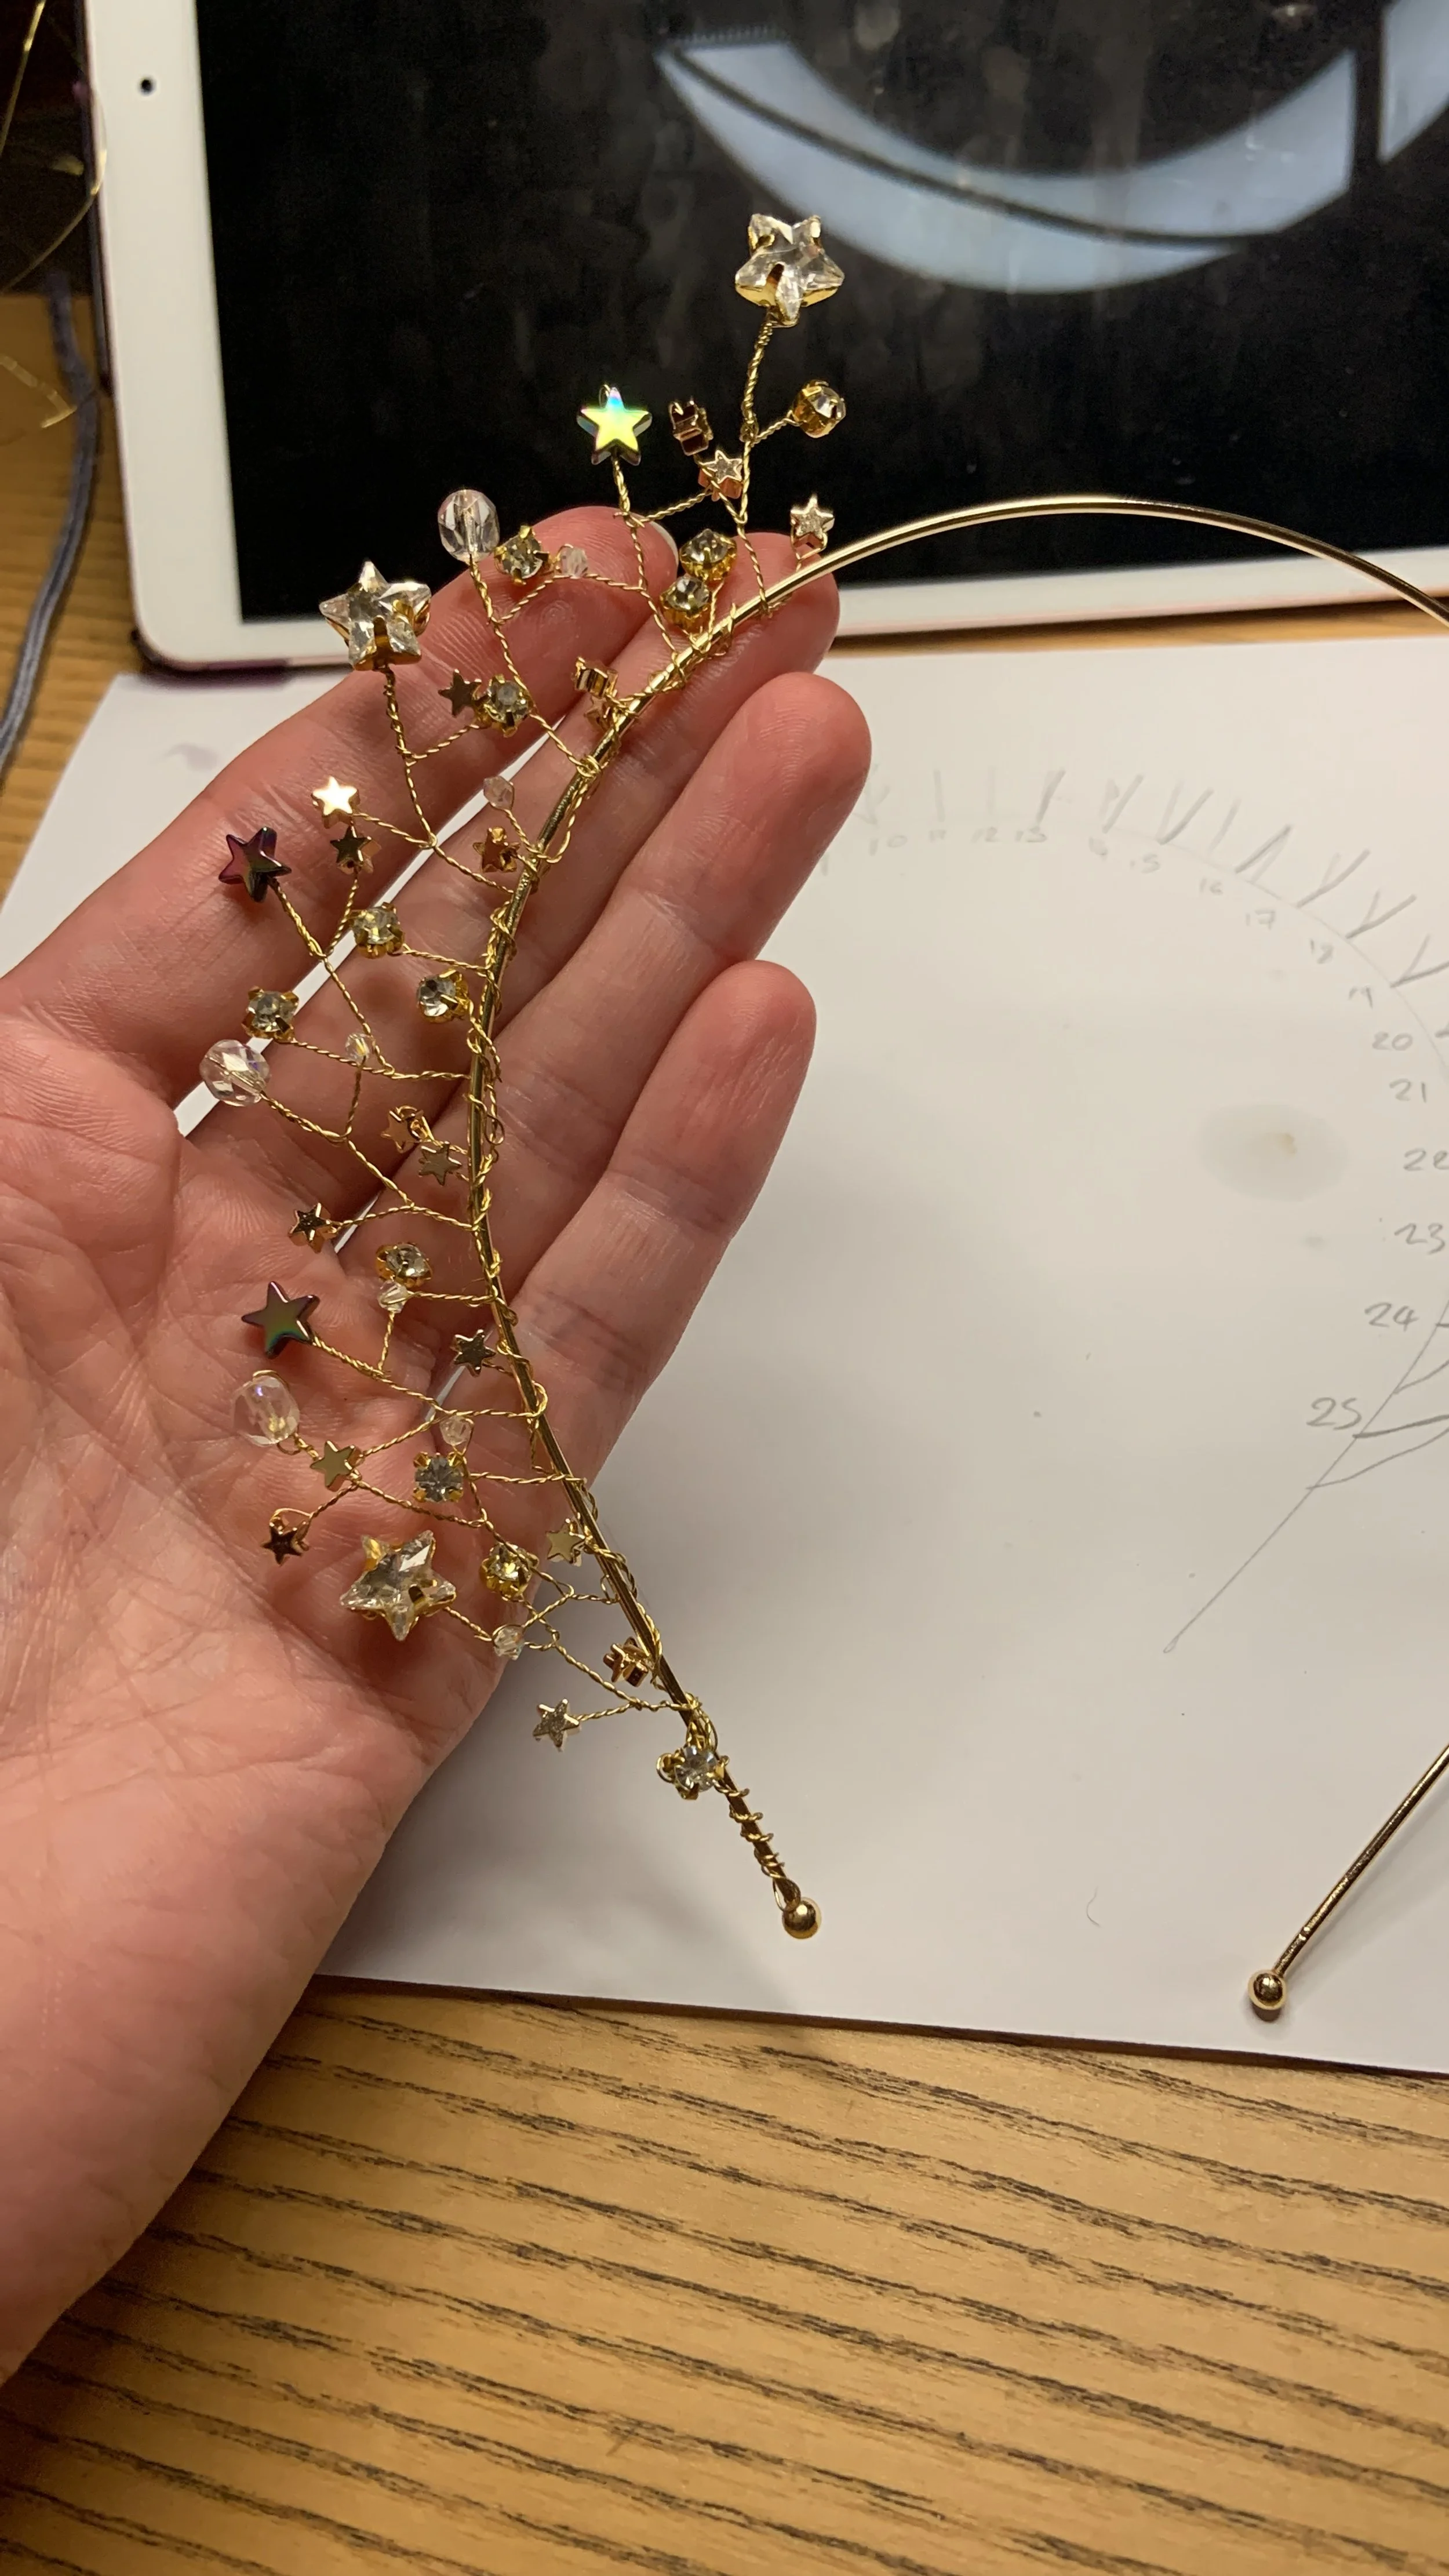
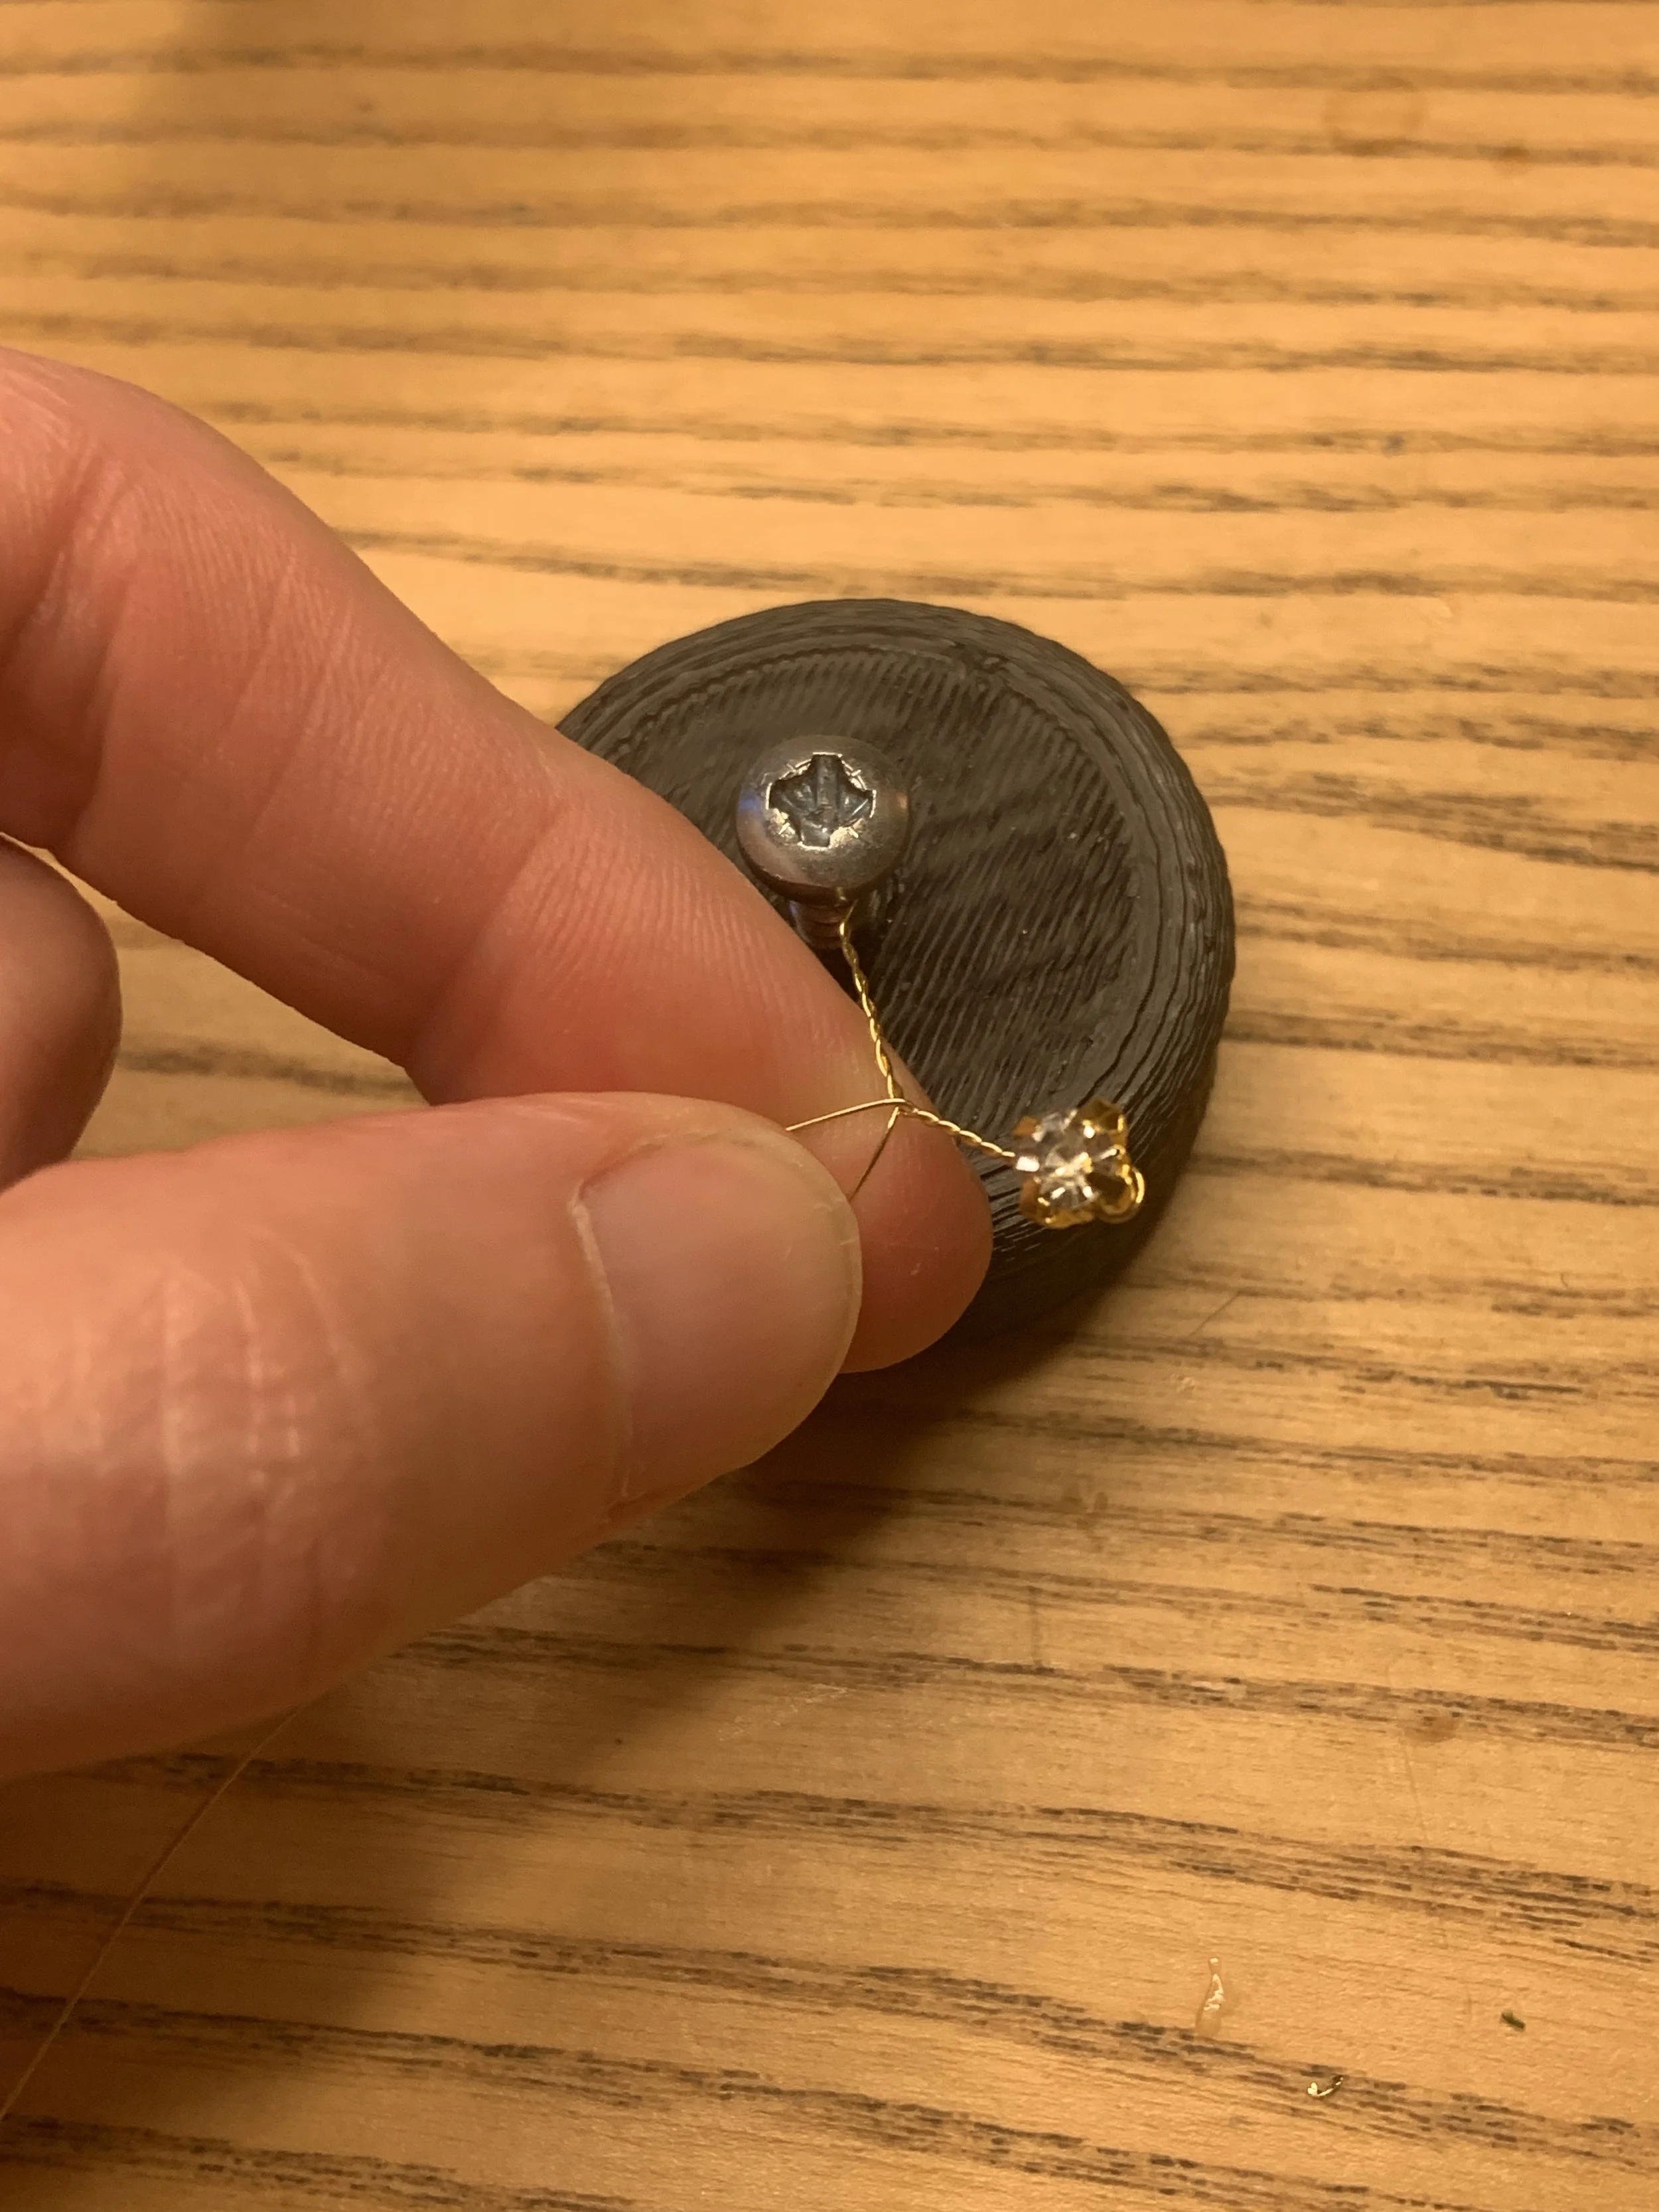
To affix the branches to the hairband, simply twist the bottoms of the branches tightly around the band. I used the lowest branch on the stalk to loop around the band and give it some more stability. Once all of them are on, I recommend carefully wrapping some ribbon of your colour choice carefully around the hairband over the twisted wire. Any little sharp pieces of wire will be covered. Affix at either end with a little dab of superglue.

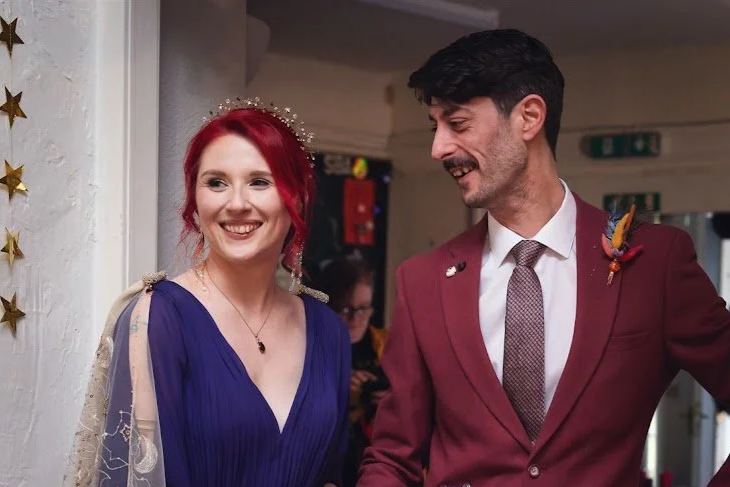
The final crown!
I hope you found my instructions easy to follow! Enjoy making your crown!
Price Breakdown
Gold Plated Beading Wire- eBay- £3.35
Gold Tiara Base- eBay- £3.05
Gold/Haematite Star Beads- eBay- £7.00
Star/Round Crystal Beads- BeadsFactor on Etsy - £10.84
Clear AB Bicone Crystal Beads- eBay- £2.83
Purple Ribbon- eBay- £1.47
Total: £28.54